If I were to open up a restaurant...it would be small and modest. It would be open for all those craving a little home cooked food. The menu would change with the seasons based on available fresh produce. It would sit maybe 10 tables. It would hold an espresso bar. There would be four types of cookies: chocolate chip, oatmeal, sugar, and peanut butter.
Day dreaming about opening a restaurant wasn't something on the planned to do list. This one was plotted and word grown by my loving dear husband. We would toss around plans. Along with the fun one about packing up and living in Maui, Hawaii. It is just fun to pretend and to think about what if we had enough money. But there definitely could be a restaurant in our future as we become more financial stable. So join me on my journey to what it would take to open a restaurant with my husband. I love to plan and I love to budget and I love to cook... then all I need is the inner drive to make it happen in reality.
At the moment, I'll just pretend that my home kitchen is the cafe. It is a small, modest restaurant that feeds my family a home cooked meal.
Monday, March 12, 2012
Wednesday, February 8, 2012
Connecting Through Cooking
Each new day contains the chance for a new experience. Each upcoming minute you can try something you haven't done before and also the chance for do-overs. I challenged myself to make a new recipe called a gordita. It was a recipe on the back of the bag. I thought why not? Usually the recipe is kitchen tested so that all who try the recipe may experience the same results. So I made a batch of the dough and it was a fairly good amount. I cooked up a few gorditas just enough for two and had lots dough remaining. Here I was left with a big ball of dough and I hadn't really enjoyed the taste enough to want to eat it again. What could I do?
A light bulb popped over the top of my head from my creative energy, why not make tamales with it? I researched the Internet to see if anyone else might have ran into the same problem. I found recipes and techniques for tamales handy but I just had to try with my adaptation. I stopped by the store and picked up corn husks. I had left over tri-tip that I chopped up with a little sauce. (Still working on this part of the recipe-- the inner stuffing.)
As I started preparing the outer part of tamales, my son's girlfriend was over for dinner and she watched me pat the gordita dough into the corn husks. She was eager to help. Next thing I knew we had prepared at least 14 tamales with the dough and a meat & cheese stuffing.
My technique for steaming the tamales was a little challenging. I had on hand a bamboo steamer that would fit into my wok. Yes- I decide to adapt an Asian cooking method for Mexican cuisine. I made sure to rotate my bamboo boxes to make sure the tamales all cooked equally. Finally when I thought they were almost done, I pulled one out to try. We each had a fork in hand ready to take a steamy bite of tamale goodness. This bite was enough to erase our thinking on how hard it was to make tamales in prior attempts. Definitely we both learned that we could make tamales and make them taste good. We just needed to try with leftover gordita dough and a bamboo steamer.
Have fun cooking!
Thursday, February 2, 2012
From the Beginning to the End
Series: Produce Box, January 31, 2012 Deliver; Published Blog 14
I quietly recalled in my mind my first produce box delivery and thought about how it will be from my friend when she gets her first produce box delivered to her front porch. As much as I can instruct and guide, the excitement of finding the box on the porch and opening it up is way fun and cool to discover in the early hour mornings (even before the caffeine has entered my system.)
As I am pouring the words onto my blog and deciding how I approach each produce box delivery. Here's my step by step thinking from beginning to the end.
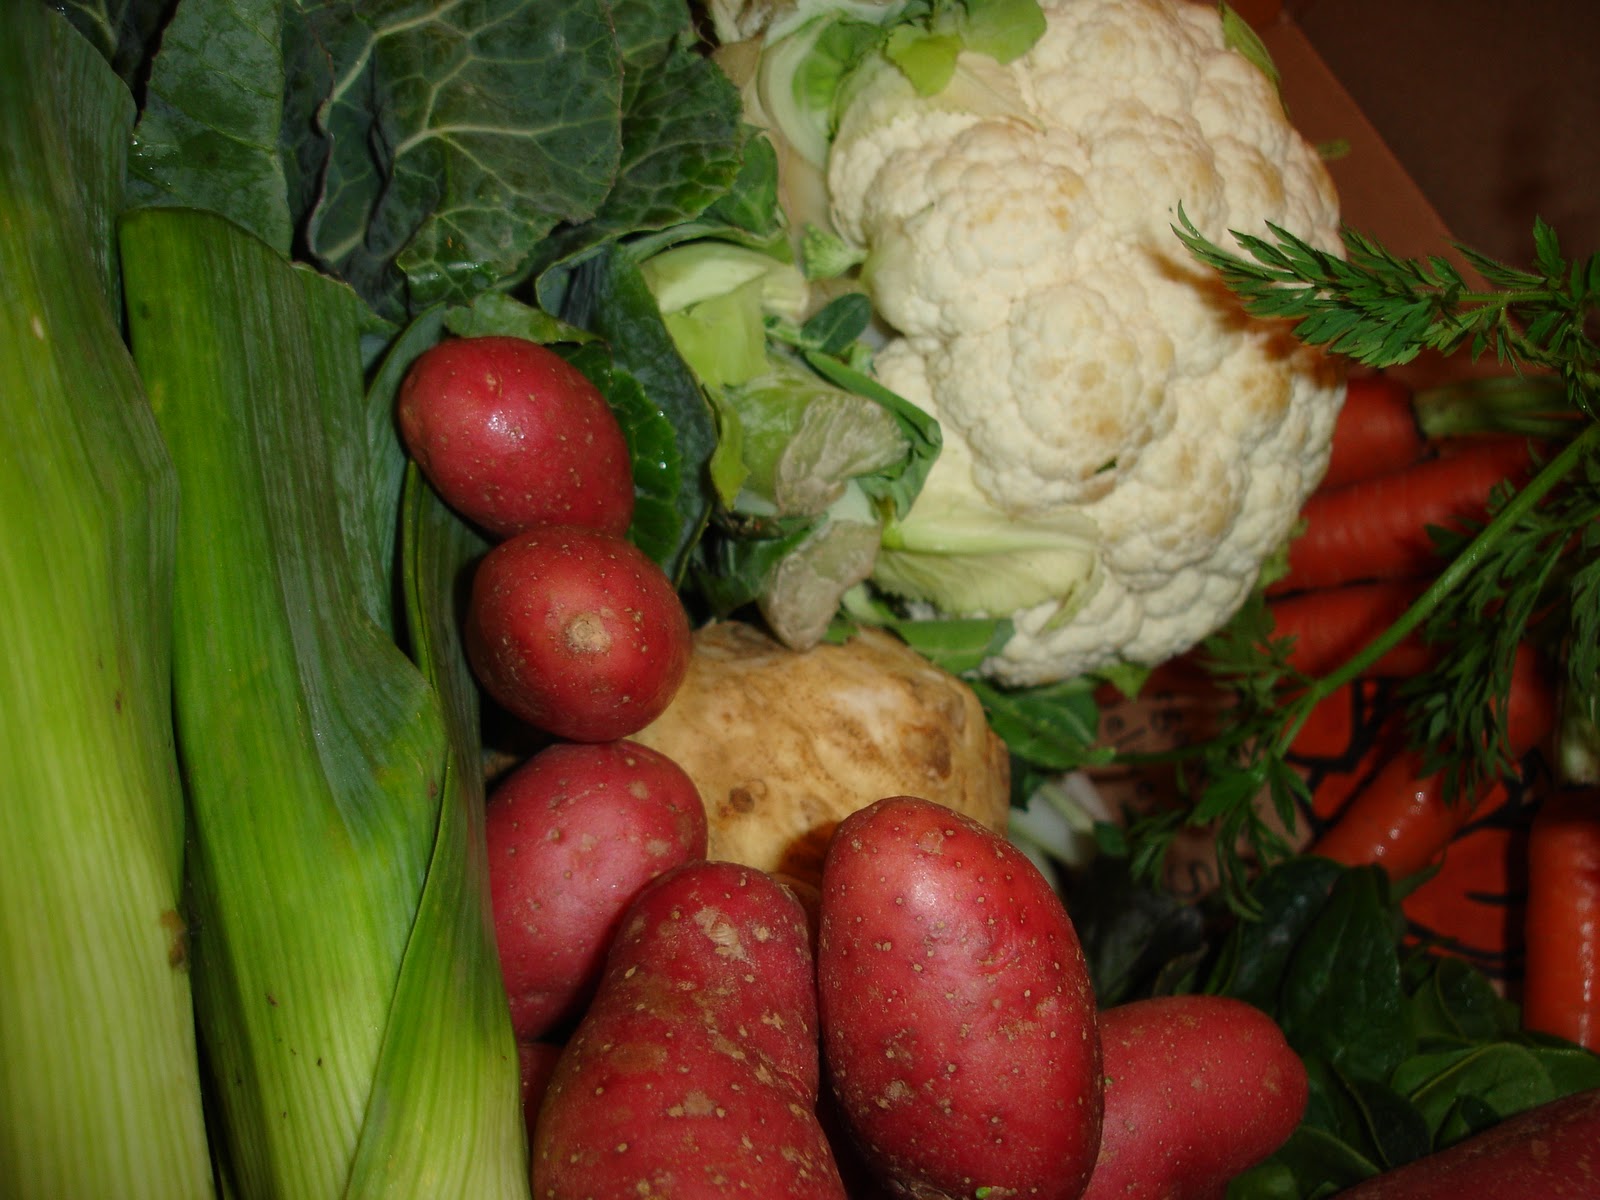
I pull each one of my vegetables out and compare it to the list I receive from Farm Fresh to You.
My order:
1 head of cauliflower,
1 pound of french fingerling potatoes,
1 pound of celery root,
l bunch of leeks,
1 bunch of broccoli,
1 head of radicchio,
1 bunch of carrots,
1 bunch of spinach,
1 bunch of collards,
2 bunch of chard, and
1 head of lettuce.

The next step I perform:
I take inventory of the current vegetables I have on hand and ones that needs to be consumed within the next few days. I really, really, really dislike wasting food because wasting food is wasting money. I eat what I cook, I prepare what needs to be used, and prevent waste as much as possible. I am expert of using up leftovers. I also prepare smaller meals for the family to minimize the amount of food leftover. Plus performing all this leaves little room for growing strange stuff in containers in the back of the fridge.
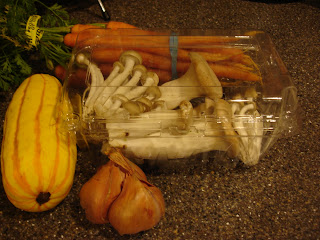
When I took inventory here's what I found:
leek
squash
mushroom
bunch of mint
container of blueberries
an onion
rosemary sprigs
carrots
ginger
lemon grass
celery
cabbage
potatoes
apples
garlic
shallots
I make sure that when I place all the vegetables into my drawer that I rotate my new produce to the bottom and older stuff on top. Again to help promote using food before it is wasted.
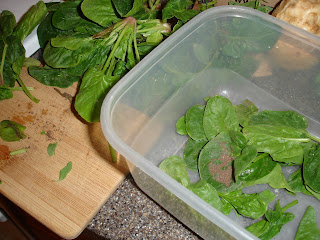
One last item to bring up that I think is helpful is the realization that the farm fresh produce isn't beautified as you would receive in the stores. The green leaf plants hold onto their dead leaves and dirt caked on green petals. The roots and stems aren't plucked. There might be live bugs still living on the plant. So don't be too surprised... this is the stuff that farmers experience when they pry the plants out of the ground and place it on their own counters.
My final step is prepping the vegetable for our dinner night.
How to Soak Your Green Leaf Plants:
For chard, kale, and collards: I use a small sharp knife to remove the stems. Place the leaves in bowl and fill up with cold water. Let them soak. Agitate like washing machine. Drain the water and fill up again. I rinse again and drain the water. Before use, I try to dry as much water off before I cook it up.
For spinach and lettuce: I pull off the leaves and place it in a bowl. I soak in them in cold water. Drain, rinse, soak again if necessary, or allow to dry. If using later on, wrap up in a paper towel and place it in a bag.
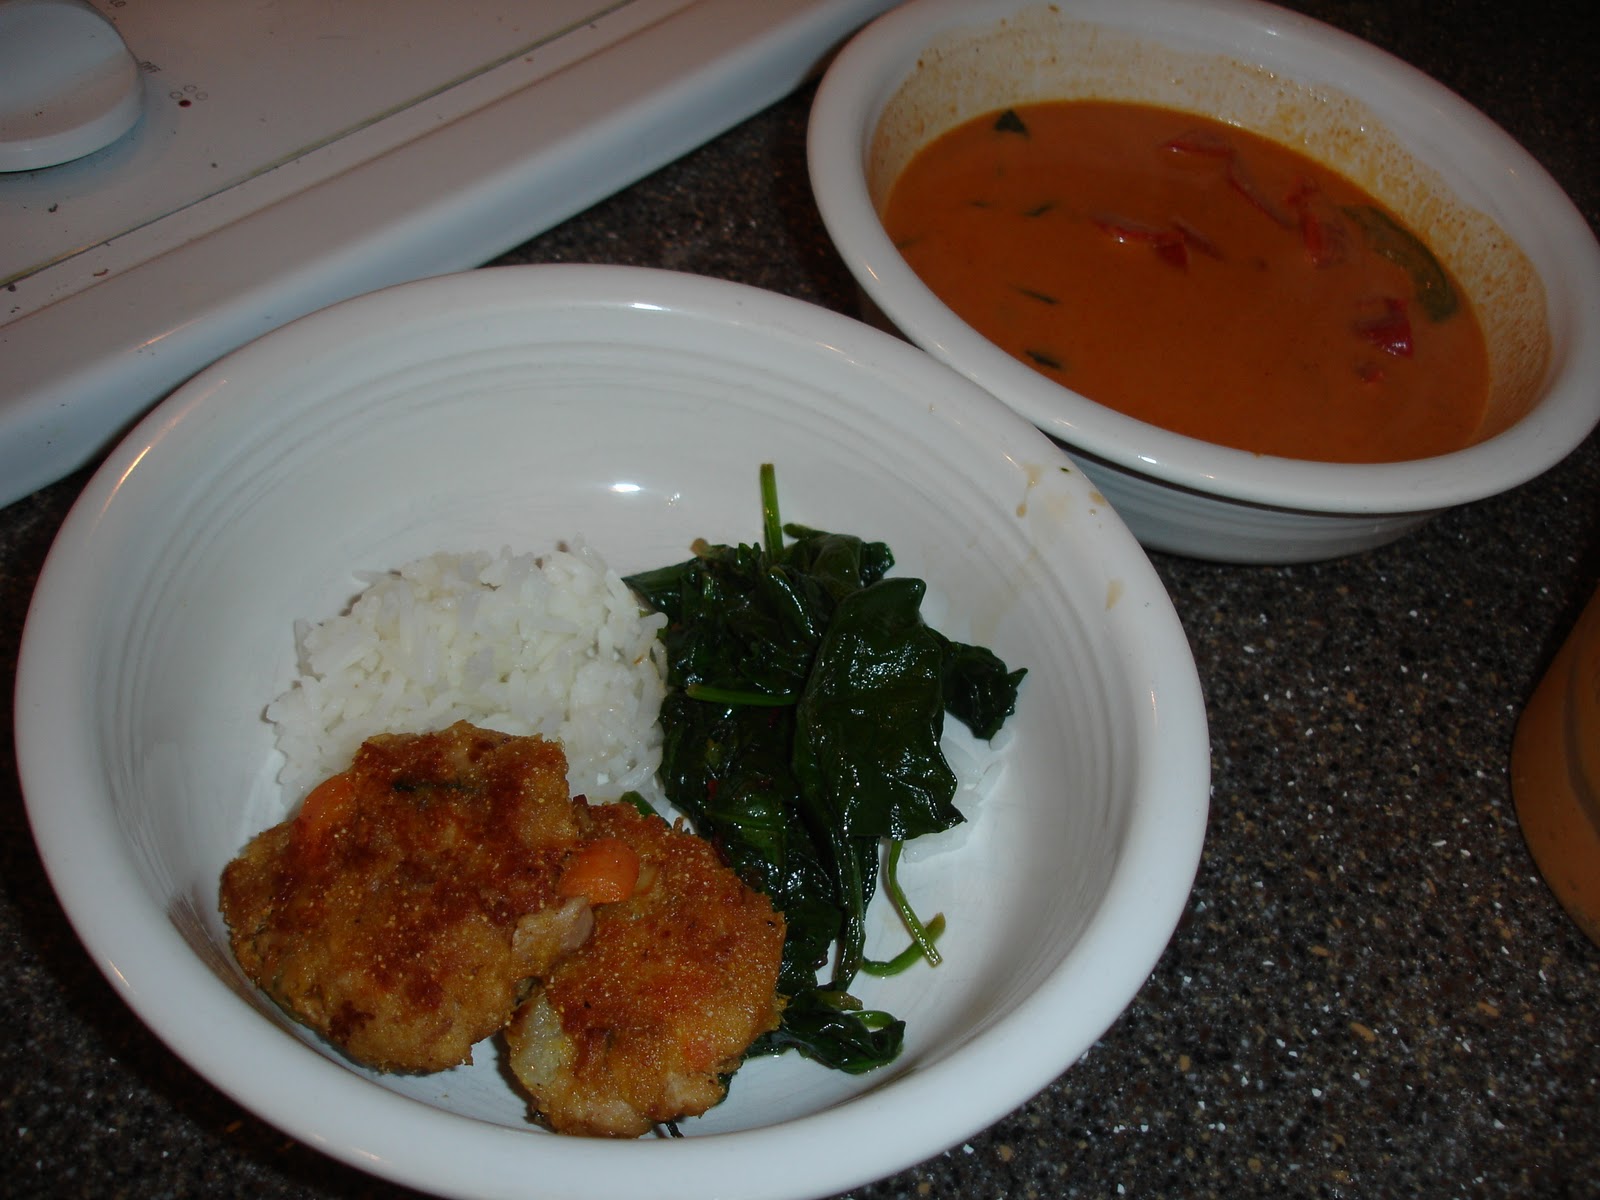
A Meal Dancing in Mind as Yummy!!
Jasmine Rice
Sauteed Spinach
Tuna Cakes (Find the recipe homemade salmon cakes in my cookbook.)
Red Curry Sauce
All together made Thai flavoring come alive dancing on my taste buds.
Recipes:
Sauteed Spinach
a little Olive oil
Sesame Oil - small amount because it is full on flavor!
add Fresh Red Chili Paste as much spice a little dab will do it garlic
a splash Teriyaki Sauce
washed Spinach bunch
Saute over medium heat until the leaves darken.
Red Curry Sauce
I like to add about 2-3 tablespoons of red curry paste.
I simmer it with 1 can of coconut milk.
I add a little fish sauce.
I add a little brown sugar.
I let it simmer for about 15-20 minutes.
Add some fresh Thai basil and red bell pepper slices.
In the end my tummy is happy from all the vegetables I have eaten. My fridge is full for at least a week. I had and will keep on having fun cooking!
I quietly recalled in my mind my first produce box delivery and thought about how it will be from my friend when she gets her first produce box delivered to her front porch. As much as I can instruct and guide, the excitement of finding the box on the porch and opening it up is way fun and cool to discover in the early hour mornings (even before the caffeine has entered my system.)
As I am pouring the words onto my blog and deciding how I approach each produce box delivery. Here's my step by step thinking from beginning to the end.
I pull each one of my vegetables out and compare it to the list I receive from Farm Fresh to You.
My order:
1 head of cauliflower,
1 pound of french fingerling potatoes,
1 pound of celery root,
l bunch of leeks,
1 bunch of broccoli,
1 head of radicchio,
1 bunch of carrots,
1 bunch of spinach,
1 bunch of collards,
2 bunch of chard, and
1 head of lettuce.
The next step I perform:
I take inventory of the current vegetables I have on hand and ones that needs to be consumed within the next few days. I really, really, really dislike wasting food because wasting food is wasting money. I eat what I cook, I prepare what needs to be used, and prevent waste as much as possible. I am expert of using up leftovers. I also prepare smaller meals for the family to minimize the amount of food leftover. Plus performing all this leaves little room for growing strange stuff in containers in the back of the fridge.
When I took inventory here's what I found:
leek
squash
mushroom
bunch of mint
container of blueberries
an onion
rosemary sprigs
carrots
ginger
lemon grass
celery
cabbage
potatoes
apples
garlic
shallots
I make sure that when I place all the vegetables into my drawer that I rotate my new produce to the bottom and older stuff on top. Again to help promote using food before it is wasted.
One last item to bring up that I think is helpful is the realization that the farm fresh produce isn't beautified as you would receive in the stores. The green leaf plants hold onto their dead leaves and dirt caked on green petals. The roots and stems aren't plucked. There might be live bugs still living on the plant. So don't be too surprised... this is the stuff that farmers experience when they pry the plants out of the ground and place it on their own counters.

My final step is prepping the vegetable for our dinner night.
How to Soak Your Green Leaf Plants:
For chard, kale, and collards: I use a small sharp knife to remove the stems. Place the leaves in bowl and fill up with cold water. Let them soak. Agitate like washing machine. Drain the water and fill up again. I rinse again and drain the water. Before use, I try to dry as much water off before I cook it up.
For spinach and lettuce: I pull off the leaves and place it in a bowl. I soak in them in cold water. Drain, rinse, soak again if necessary, or allow to dry. If using later on, wrap up in a paper towel and place it in a bag.
A Meal Dancing in Mind as Yummy!!
Jasmine Rice
Sauteed Spinach
Tuna Cakes (Find the recipe homemade salmon cakes in my cookbook.)
Red Curry Sauce
 |
| Jubilee's Taste of Thai |
All together made Thai flavoring come alive dancing on my taste buds.
Recipes:
Sauteed Spinach
a little Olive oil
Sesame Oil - small amount because it is full on flavor!
add Fresh Red Chili Paste as much spice a little dab will do it garlic
a splash Teriyaki Sauce
washed Spinach bunch
Saute over medium heat until the leaves darken.
Red Curry Sauce
I like to add about 2-3 tablespoons of red curry paste.
I simmer it with 1 can of coconut milk.
I add a little fish sauce.
I add a little brown sugar.
I let it simmer for about 15-20 minutes.
Add some fresh Thai basil and red bell pepper slices.
In the end my tummy is happy from all the vegetables I have eaten. My fridge is full for at least a week. I had and will keep on having fun cooking!
Saturday, January 21, 2012
Sending Good Health and Happiness
Series: Produce Box, January 17, 2012 Deliver; Published Blog 13
A new year and one year older are two things in common for me in this New Year. Resolutions are promises we make when we ring in the New Year but I think they can be made at anytime. Do you want to eat more fresh vegetables? Then go out and do it! Do you want to exercise more? Stop reading and run in place for 10 minutes. Then sit down and write down a recipe for eating more vegetables. I may sound like a drill sergeant trying to get you motivated but all that is holding us back is ourselves. Trying to improve yourself does take hard work but the end result will make you feel better. I can attest the results of my advice. A glimpse of the steps for improving my health and the ones who dine with me.
Our produce box this month includes the following items:
2 Delicata Squash
1 Cauliflower
1.5 lbs Potatoes
.5 lbs Shallots
.5 lbs Mushrooms
1 Leek
1 Broccoli Bunch
1 Nantes Carrots
1 Assorted Kale Bunch
1 Red Leaf Lettuce Bunch
My approach with using a produce box in my menu planning is to use up as many vegetables as necessary.At the start of each week I try to create a rough draft of a menu that is constantly changing as to what I have on hand due to consuming of groceries and the grazing of vegetables. I do not think of the long, hard work of prepping of raw vegetables. I think of the nutrients my body needs and in order to remain healthy. I use these delightful morsels made from the Earth to sustain me. Back in time - people prepared food and used less package food. We want to spend time on other things and less time in preparing; however, in the modern day of conveniences it is now even easier to spend more time on preparing than using a package. Just imagine a day without having to make sure you are sitting on the couch in front of a television waiting for your program only on at a certain time. Or washing dishes right after dinner instead a machine does it for you while you multi-task with another machine to do the laundry. All these wonderful items of technology has saved us time to do other things - why not it be cooking healthy meal?
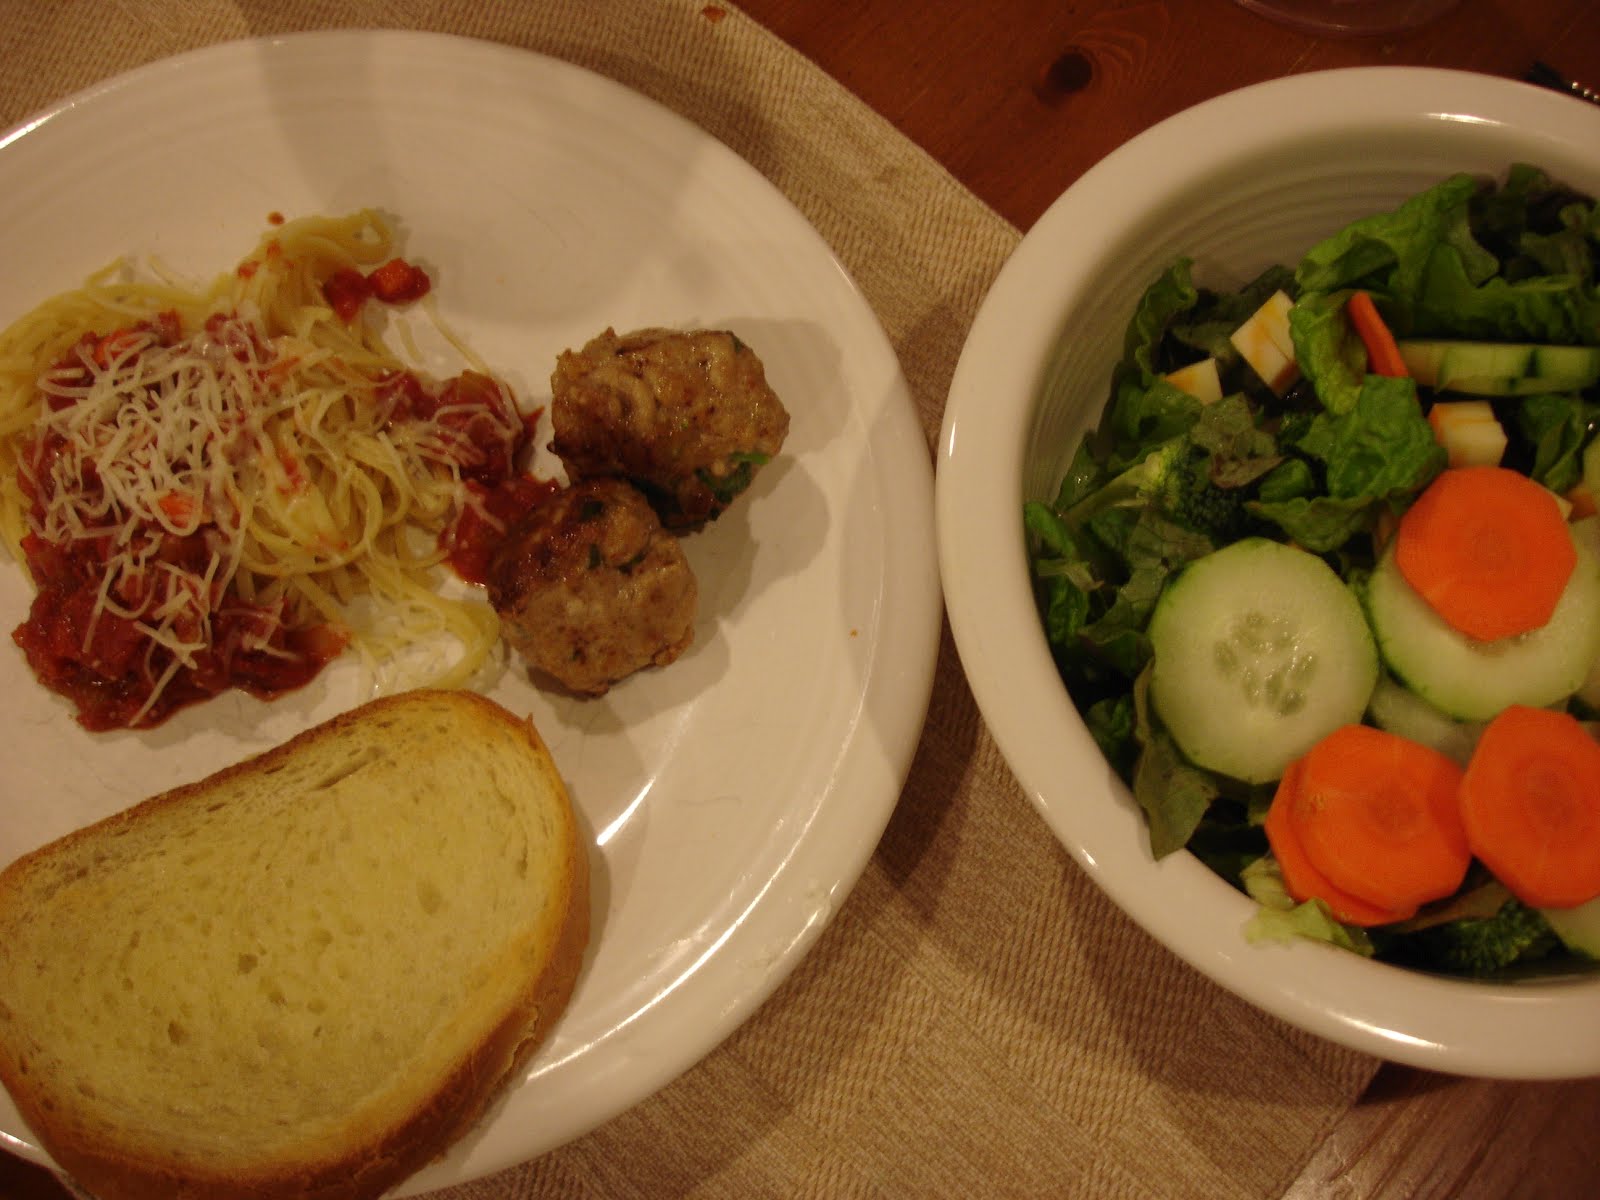
Jubilee's Vegetable Tomato Sauce for Your Linguine Fini (or Spaghetti)
1/2 Onion, diced 1/2 Fennel Bulb, diced 1 Shallot, minced 1 pinch of Red Pepper flakes a handful of small mushrooms 1 Celery, diced 1 Carrot, diced 28oz of tomatoes - I choose to use a can in my cupboard but when in season use about 3-4 tomatoes. pepper, oregano, and garlic powder for seasoning My preference is to add about 1-2 tsp of balsamic vinegar and a few drops of Tabasco. If you would like it a little sweet add in a few pinches of sugar. Let the sauce simmer for about 15-20 minutes. Turn it off. Boil your pasta according to package. If you have on hand, add in a few whole garlic cloves. It will add a nice garlic taste and cook up the garlic to spread into a paste to add to your pasta. It is truly a wonderful flavor or you can add it to bread for garlic bread. My sides for tonight's dinner will be meatballs, a slice of garlic bread and a garden salad.
Meat Balls
This recipe is so easy that you think twice about grabbing that package of meatballs in the freezer section next time you want meatballs. 1 lb of your choice of ground meat. I like to you turkey or pork. With an Italian dish then mix a 1/2 pound of ground turkey and 1/2 pound ground Italian sausage. Add in 1 egg Add in a teaspoon of garlic, minced Add in pepper and salt to taste Add in 1/3 cup of breadcrumbs A tip with seasoning your meatballs-- more flavor can be created with adding in fresh herbs like basil, spinach, mushrooms, or sun dried tomatoes. Don't be afraid to experiment. It is worth the taste. Mix all the ingredients together into one big meatball. Split in half. Take one of the halves and split into 8 balls. Continue splitting with the rest until you have a total of 16 meatballs. Brown 8 meatballs at a time in the pan with a little oil. I cook the meatballs until they are brown on all the edges. I then place it in an oven at 350 degrees for about 20-25 minutes until well done. At this point if you decide not to eat all the meatballs you have the option of letting them cool and place then in a bag. Use them in another meal later on in the week maybe like meatball sandwiches.
Garden Salad
Green Leaf Lettuce, Carrots, Broccoli, and Cauliflower. Toss with a little cheese and dressing. A nice side of vegetables to go with my vegetables. I think I have managed to eat all my serving of vegetables in one sitting. Love it! (Plus as a bonus the veggies fill me up faster than the pasta.) I offer a challenge those wanting one just for today... See how many vegetables you can eat in one meal?

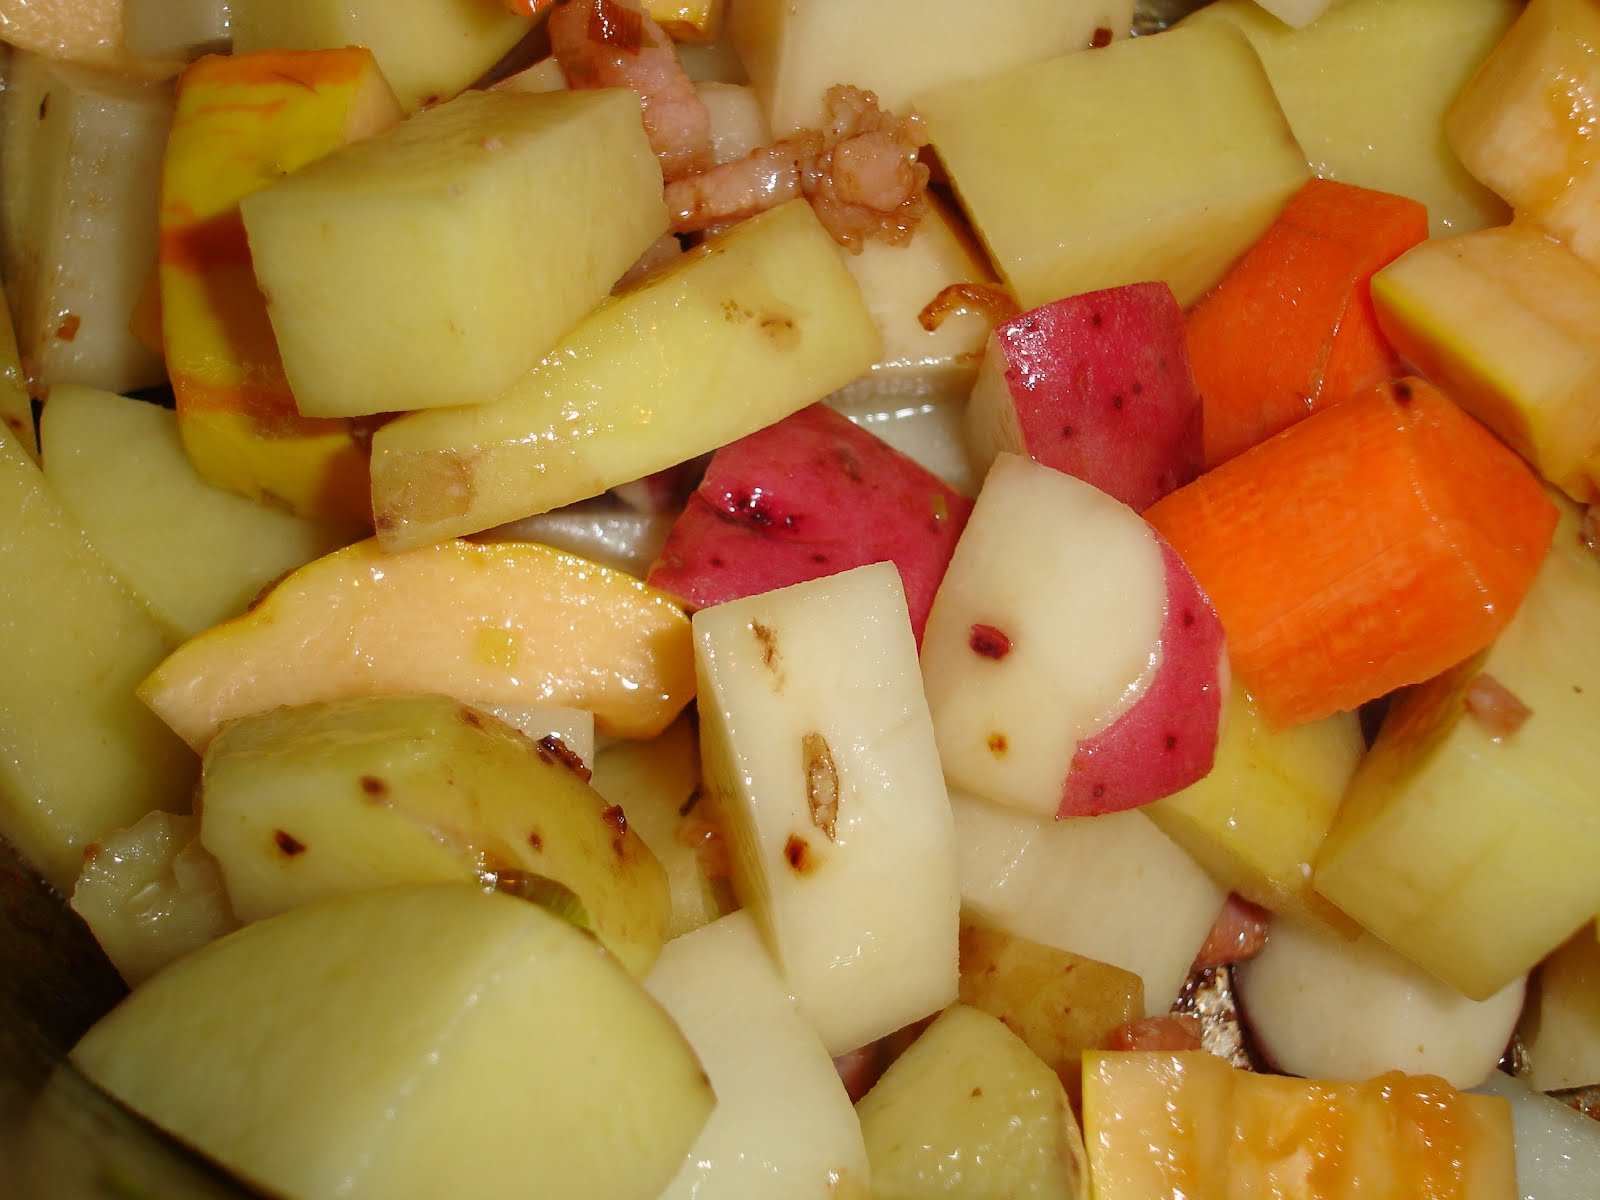
Trying new vegetables... I received a vegetable this week in my produce box that I hadn't tried before and it is the Delicata Squash. I thought it might be like a zucchini but it was a cross with butternut squash. The texture was thick and meaty with big seeds in the middle. I looked up recipes on what others my do with the Delicata Squash. Some thought roasting it was good or stuffing it with ingredients. So I decided to use it in my Leek and Potato Stew recipe. This isn't a vegetarian recipe but it can be with the elimination of cheese and sour cream (but I enjoy eating the items so I included it.) You are the chef of your own food. Each to their own when adding ingredients or eliminating them.
Leek and Potato Stew
A thick stew that fills you up when it is cold and miserable outside. On the night I made this stew, the wind was howling and sheets of rain floated across the street. A great night to stay in and have a homemade meal.
Heat up a large soup pot on medium heat. Add in about 1-2 teaspoons of oil. Add in your thinly sliced leeks. Stir and let it cook until brown on the edges. Remove from the pot and place in a bowl until later. Add in the following diced items: 2 large brown potatoes, 2 white potatoes, 2 red potatoes, 1 carrot, and 1 delicata squash. Season with pepper and salt. All it to cook for about 5-7 minutes, stirring occasionally.
 Add in the 3 1/2 cups of stock.(I used up my fennel vegetable stock that I had in the freezer.) Turn up the heat and allow it boil/simmer for until the potatoes are mashable. Mash the potatoes, carrots, and delicata squash and then allow it to continue cooking until it becomes thicker if you so desired.
Add in the cooked leeks. Allow to it cook for a few minutes to heat up the leeks.
Remove it from heat and add in about a 1/3 cup of good cheddar cheese and 1/4 cup of sour cream. Mix together and grab your bowl. Spoon in a about cup of it. This is a filling stew. Serve with a piece of toasted bread and a garden salad.
Have Fun Cooking!
A new year and one year older are two things in common for me in this New Year. Resolutions are promises we make when we ring in the New Year but I think they can be made at anytime. Do you want to eat more fresh vegetables? Then go out and do it! Do you want to exercise more? Stop reading and run in place for 10 minutes. Then sit down and write down a recipe for eating more vegetables. I may sound like a drill sergeant trying to get you motivated but all that is holding us back is ourselves. Trying to improve yourself does take hard work but the end result will make you feel better. I can attest the results of my advice. A glimpse of the steps for improving my health and the ones who dine with me.
Our produce box this month includes the following items:
2 Delicata Squash
1 Cauliflower
1.5 lbs Potatoes
.5 lbs Shallots
.5 lbs Mushrooms
1 Leek
1 Broccoli Bunch
1 Nantes Carrots
1 Assorted Kale Bunch
1 Red Leaf Lettuce Bunch
My approach with using a produce box in my menu planning is to use up as many vegetables as necessary.At the start of each week I try to create a rough draft of a menu that is constantly changing as to what I have on hand due to consuming of groceries and the grazing of vegetables. I do not think of the long, hard work of prepping of raw vegetables. I think of the nutrients my body needs and in order to remain healthy. I use these delightful morsels made from the Earth to sustain me. Back in time - people prepared food and used less package food. We want to spend time on other things and less time in preparing; however, in the modern day of conveniences it is now even easier to spend more time on preparing than using a package. Just imagine a day without having to make sure you are sitting on the couch in front of a television waiting for your program only on at a certain time. Or washing dishes right after dinner instead a machine does it for you while you multi-task with another machine to do the laundry. All these wonderful items of technology has saved us time to do other things - why not it be cooking healthy meal?

1/2 Onion, diced 1/2 Fennel Bulb, diced 1 Shallot, minced 1 pinch of Red Pepper flakes a handful of small mushrooms 1 Celery, diced 1 Carrot, diced 28oz of tomatoes - I choose to use a can in my cupboard but when in season use about 3-4 tomatoes. pepper, oregano, and garlic powder for seasoning My preference is to add about 1-2 tsp of balsamic vinegar and a few drops of Tabasco. If you would like it a little sweet add in a few pinches of sugar. Let the sauce simmer for about 15-20 minutes. Turn it off. Boil your pasta according to package. If you have on hand, add in a few whole garlic cloves. It will add a nice garlic taste and cook up the garlic to spread into a paste to add to your pasta. It is truly a wonderful flavor or you can add it to bread for garlic bread. My sides for tonight's dinner will be meatballs, a slice of garlic bread and a garden salad.
Meat Balls
This recipe is so easy that you think twice about grabbing that package of meatballs in the freezer section next time you want meatballs. 1 lb of your choice of ground meat. I like to you turkey or pork. With an Italian dish then mix a 1/2 pound of ground turkey and 1/2 pound ground Italian sausage. Add in 1 egg Add in a teaspoon of garlic, minced Add in pepper and salt to taste Add in 1/3 cup of breadcrumbs A tip with seasoning your meatballs-- more flavor can be created with adding in fresh herbs like basil, spinach, mushrooms, or sun dried tomatoes. Don't be afraid to experiment. It is worth the taste. Mix all the ingredients together into one big meatball. Split in half. Take one of the halves and split into 8 balls. Continue splitting with the rest until you have a total of 16 meatballs. Brown 8 meatballs at a time in the pan with a little oil. I cook the meatballs until they are brown on all the edges. I then place it in an oven at 350 degrees for about 20-25 minutes until well done. At this point if you decide not to eat all the meatballs you have the option of letting them cool and place then in a bag. Use them in another meal later on in the week maybe like meatball sandwiches.
Garden Salad
Green Leaf Lettuce, Carrots, Broccoli, and Cauliflower. Toss with a little cheese and dressing. A nice side of vegetables to go with my vegetables. I think I have managed to eat all my serving of vegetables in one sitting. Love it! (Plus as a bonus the veggies fill me up faster than the pasta.) I offer a challenge those wanting one just for today... See how many vegetables you can eat in one meal?
Trying new vegetables... I received a vegetable this week in my produce box that I hadn't tried before and it is the Delicata Squash. I thought it might be like a zucchini but it was a cross with butternut squash. The texture was thick and meaty with big seeds in the middle. I looked up recipes on what others my do with the Delicata Squash. Some thought roasting it was good or stuffing it with ingredients. So I decided to use it in my Leek and Potato Stew recipe. This isn't a vegetarian recipe but it can be with the elimination of cheese and sour cream (but I enjoy eating the items so I included it.) You are the chef of your own food. Each to their own when adding ingredients or eliminating them.
Leek and Potato Stew
A thick stew that fills you up when it is cold and miserable outside. On the night I made this stew, the wind was howling and sheets of rain floated across the street. A great night to stay in and have a homemade meal.
Heat up a large soup pot on medium heat. Add in about 1-2 teaspoons of oil. Add in your thinly sliced leeks. Stir and let it cook until brown on the edges. Remove from the pot and place in a bowl until later. Add in the following diced items: 2 large brown potatoes, 2 white potatoes, 2 red potatoes, 1 carrot, and 1 delicata squash. Season with pepper and salt. All it to cook for about 5-7 minutes, stirring occasionally.
Add in the cooked leeks. Allow to it cook for a few minutes to heat up the leeks.
Remove it from heat and add in about a 1/3 cup of good cheddar cheese and 1/4 cup of sour cream. Mix together and grab your bowl. Spoon in a about cup of it. This is a filling stew. Serve with a piece of toasted bread and a garden salad.
Have Fun Cooking!
Wednesday, January 4, 2012
My 1st Cookbook
I dedicate my 1st cookbook to my Dad to honor him as my inspiration for starting to cook. Both my Dad and my Mom taught both my sister and I the essentials for surviving in the kitchen.
Copy and paste into your address bar:
http://www.bookemon.com/book-profile/jubilee-dinners-and-desserts/104224
I am planning and working on a second book continue with my kitchen memories.
Happy reading and Have Fun Cooking!!
Copy and paste into your address bar:
http://www.bookemon.com/book-profile/jubilee-dinners-and-desserts/104224
I am planning and working on a second book continue with my kitchen memories.
Happy reading and Have Fun Cooking!!
Monday, December 19, 2011
Tis the Season of Cooking with Winter Vegetables
Series: Produce Box, December 20, 2011 Deliver; Published Blog 12
Scorpacciata. In Italy, scorpacciata is defined as consuming large amounts of local ingredients while in season. A produce box provides local ingredients of a certain season grown by the farmers. Currently in season are lots of winter vegetables that do not mind a little cold air or frost on their leaves. The farmer from Capay Valley even thinks that a little frost might add a little flavor to the vegetables being frosted on his farm.
In this product box series I will provide a recipe to encourage you to use vegetables in season to make your own vegetable stock. All the vegetables provided my box are organic meaning no chemicals are used in the growing process.


Optional:
Here are the remains of the vegetables that flavored the water to create the stock:

This is stock to be used in soups or stews:
Have fun cooking!
Scorpacciata. In Italy, scorpacciata is defined as consuming large amounts of local ingredients while in season. A produce box provides local ingredients of a certain season grown by the farmers. Currently in season are lots of winter vegetables that do not mind a little cold air or frost on their leaves. The farmer from Capay Valley even thinks that a little frost might add a little flavor to the vegetables being frosted on his farm.
In this product box series I will provide a recipe to encourage you to use vegetables in season to make your own vegetable stock. All the vegetables provided my box are organic meaning no chemicals are used in the growing process.

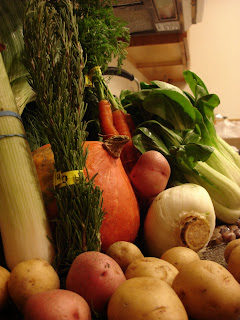
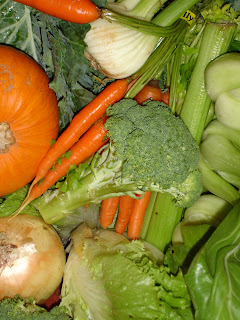
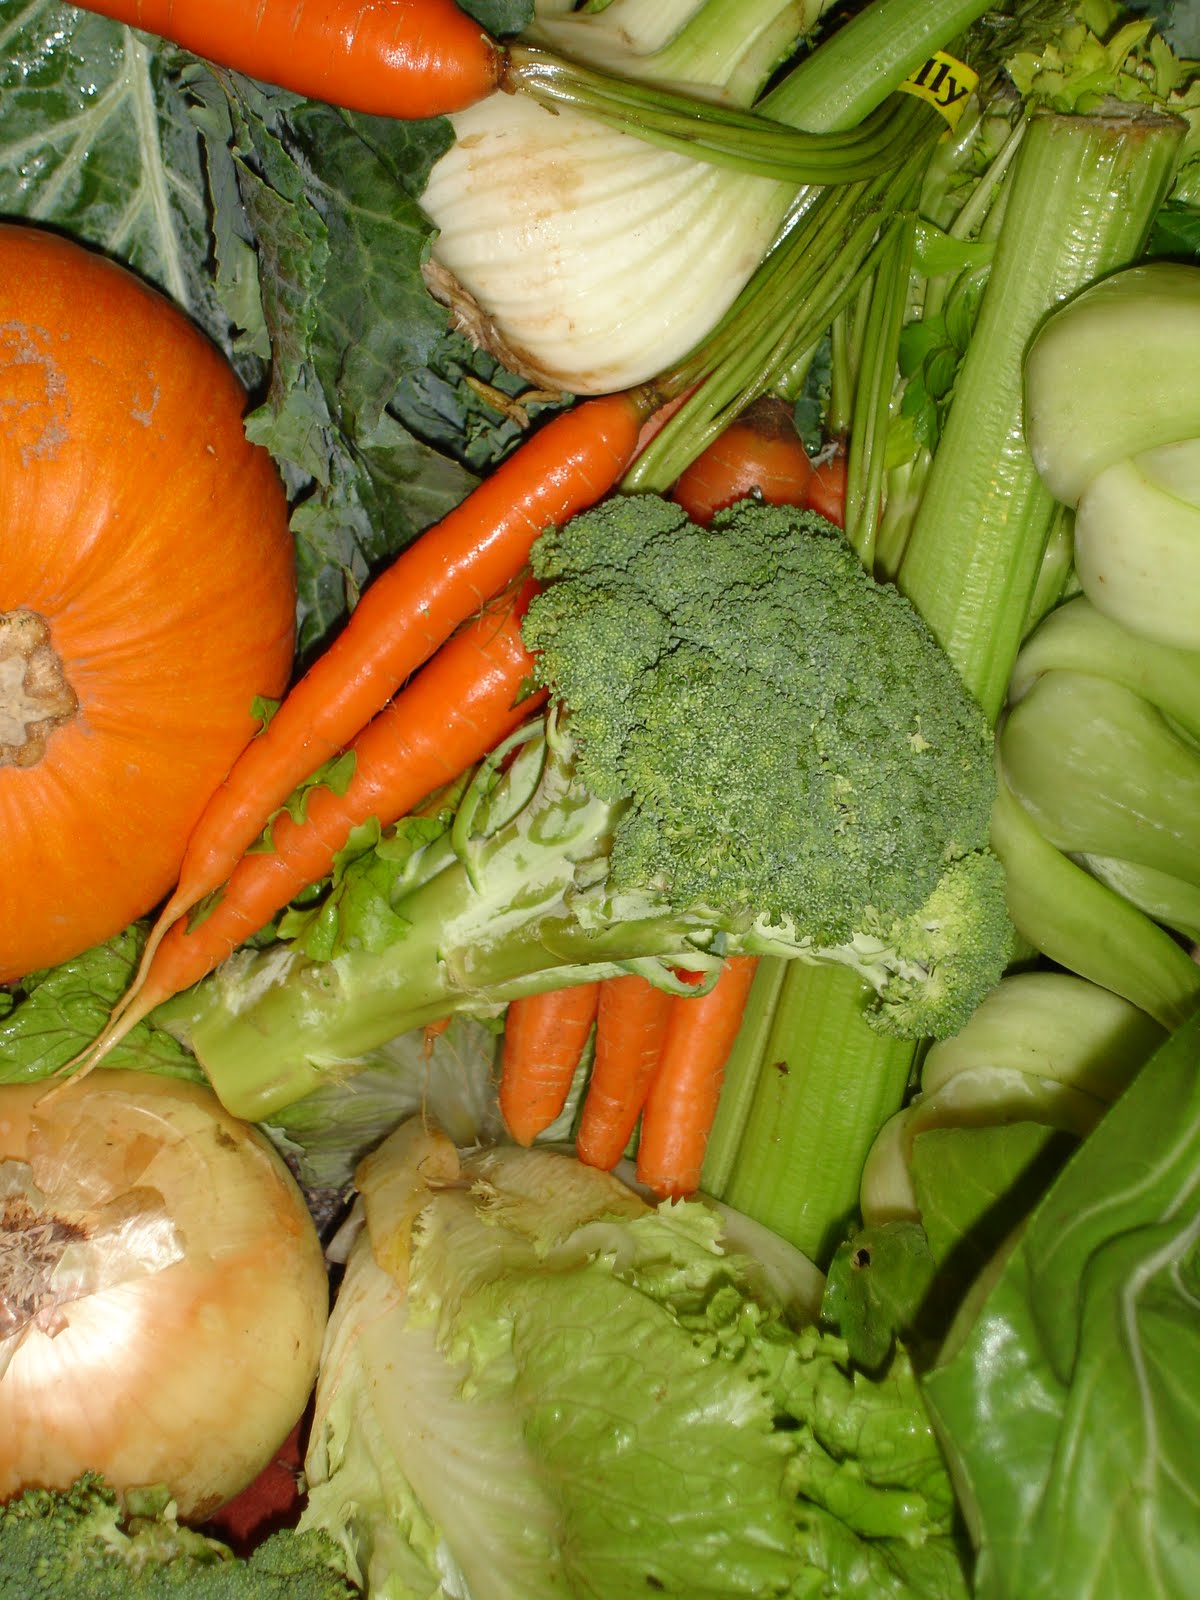
In my produce box received this week, I have the following vegetables:
1 Red Kuri Squash, winter
1 lb. Red Potatoes
1lb. White Potatoes
2lb. of Baby Bok Choy
2 Fennel
1 bunch of Leeks
1 bunch of Nantes Carrots
1 bunch of Spinach
1 bunch of Green Leaf Lettuce
1 bunch of Fresh Rosemary
Fennel Vegetable Stock
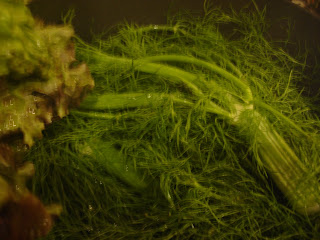
I am creating my own vegetable stock to develop into a recipe to make fennel sauce. I like the smell and flavor of fennel. It has the hint of anise but not too overpowering like black licorice. It works well as a substitute for onions since it is also a bulb. It can be diced, sliced, minced, or finely chopped. If it is sauteed the edges of the fennel caramelize up lovely. The other part of the fennel of the plant are the stalks that stick out of the ground with its leaves similar to dill plant.
Ingredients and Directions:
Grabbing a large pot and turn on the heat to about medium.
Add in 2 tablespoons of grapeseed oil (or canola oil.)
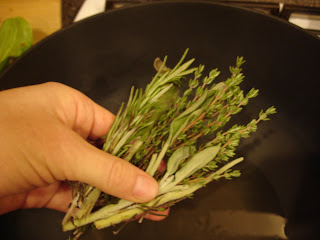
Toss in a hand full of fresh herbs: Sage, Rosemary, Thyme

1 teaspoon of minced garlic
Stir to prevent the garlic and fresh herbs from burning.
I tossed in a torn up fennel bulb piece to saute with the fresh herbs and garlic. I didn't leave anything to toss.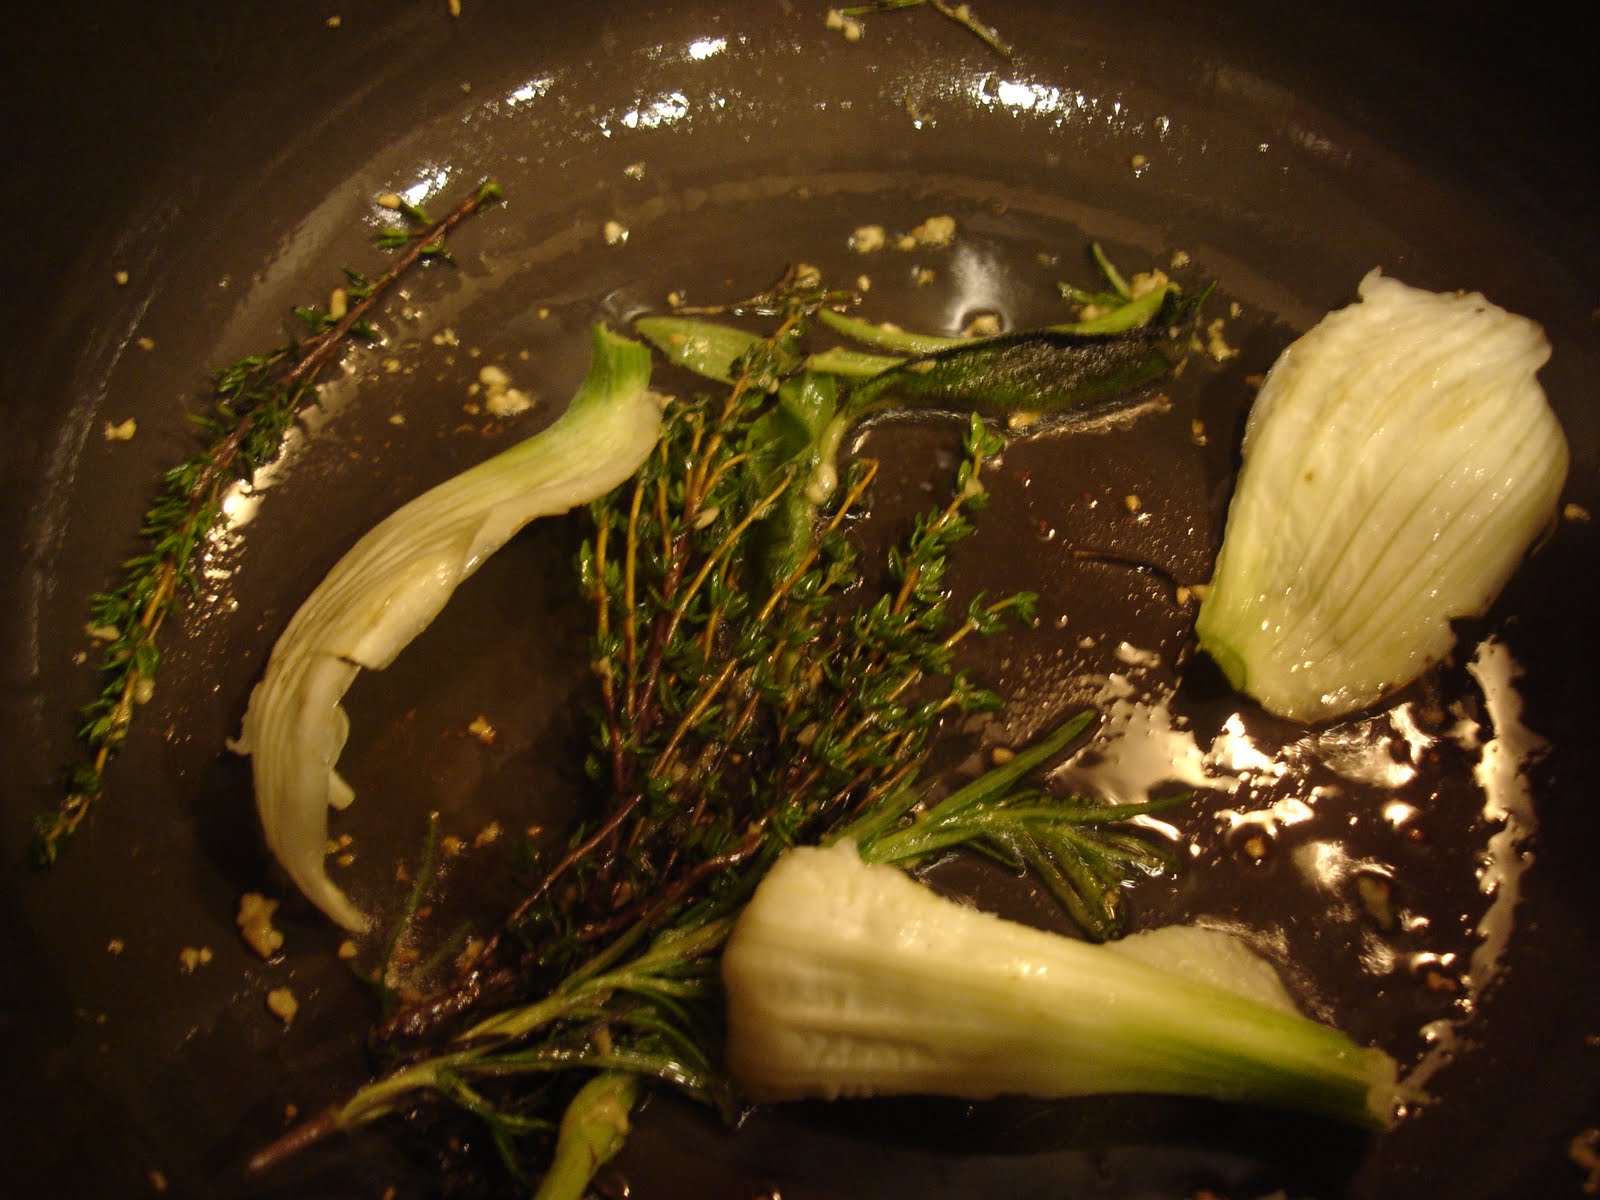
Add in the rinsed fennel stalks and stir.

Fill the pot with water covering the vegetables.

In addition to the fennel to balance the flavor I tossed in a handful of carrots and a few strangling lettuce leaves.
I also carefully flipped over the vegetables inside the pot to make sure the top of the vegetables get cooked on the bottom.
Then only seasoned with pepper- No Salt needed. Why? In your final dish of using the vegetable, you will flavor with salt. So to decrease over use of salt, do not season the vegetable stock.
Optional:
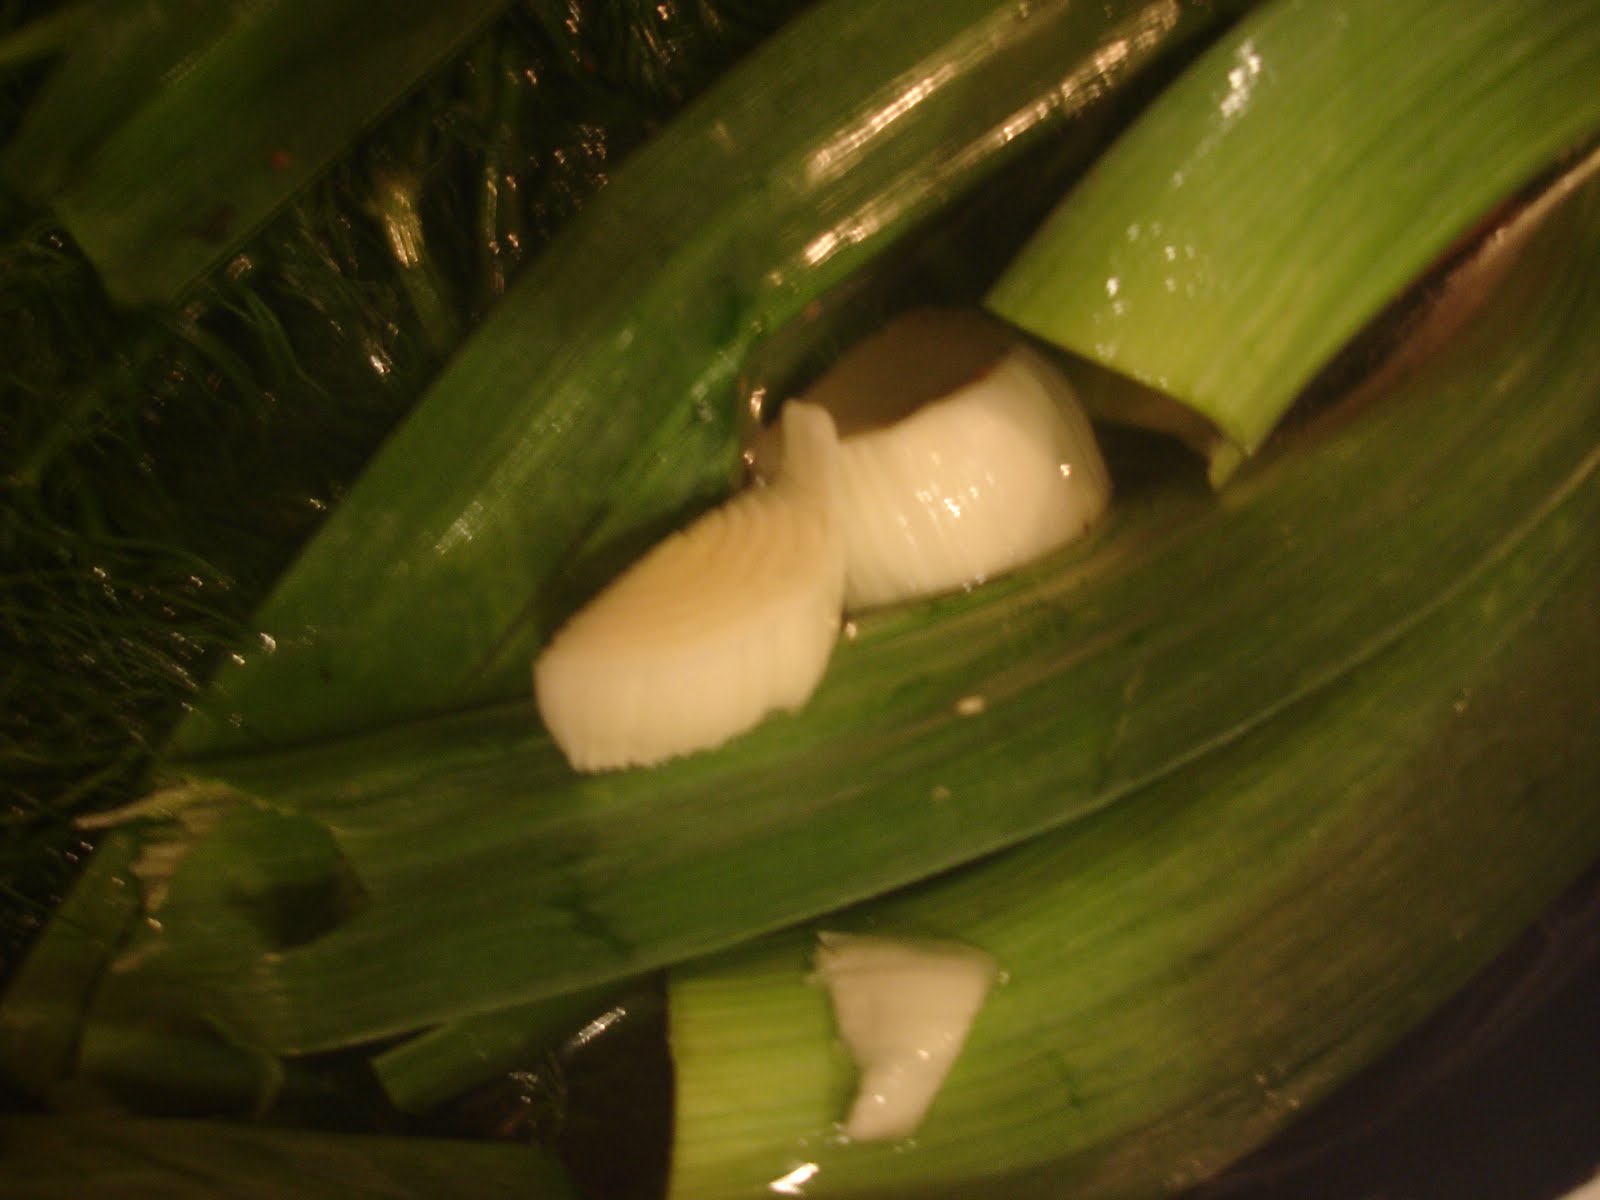
Since I was making a soup that needed leeks, I decided to toss in the green tops and part of the white bottom of leeks to my vegetable stock.
Add a lid and allow the stock to simmer for about 2 hours. Once it is done, turn off the heat and allow it to cool before removing the vegetables and straining out the fennel vegetable stock.
Here are the remains of the vegetables that flavored the water to create the stock:
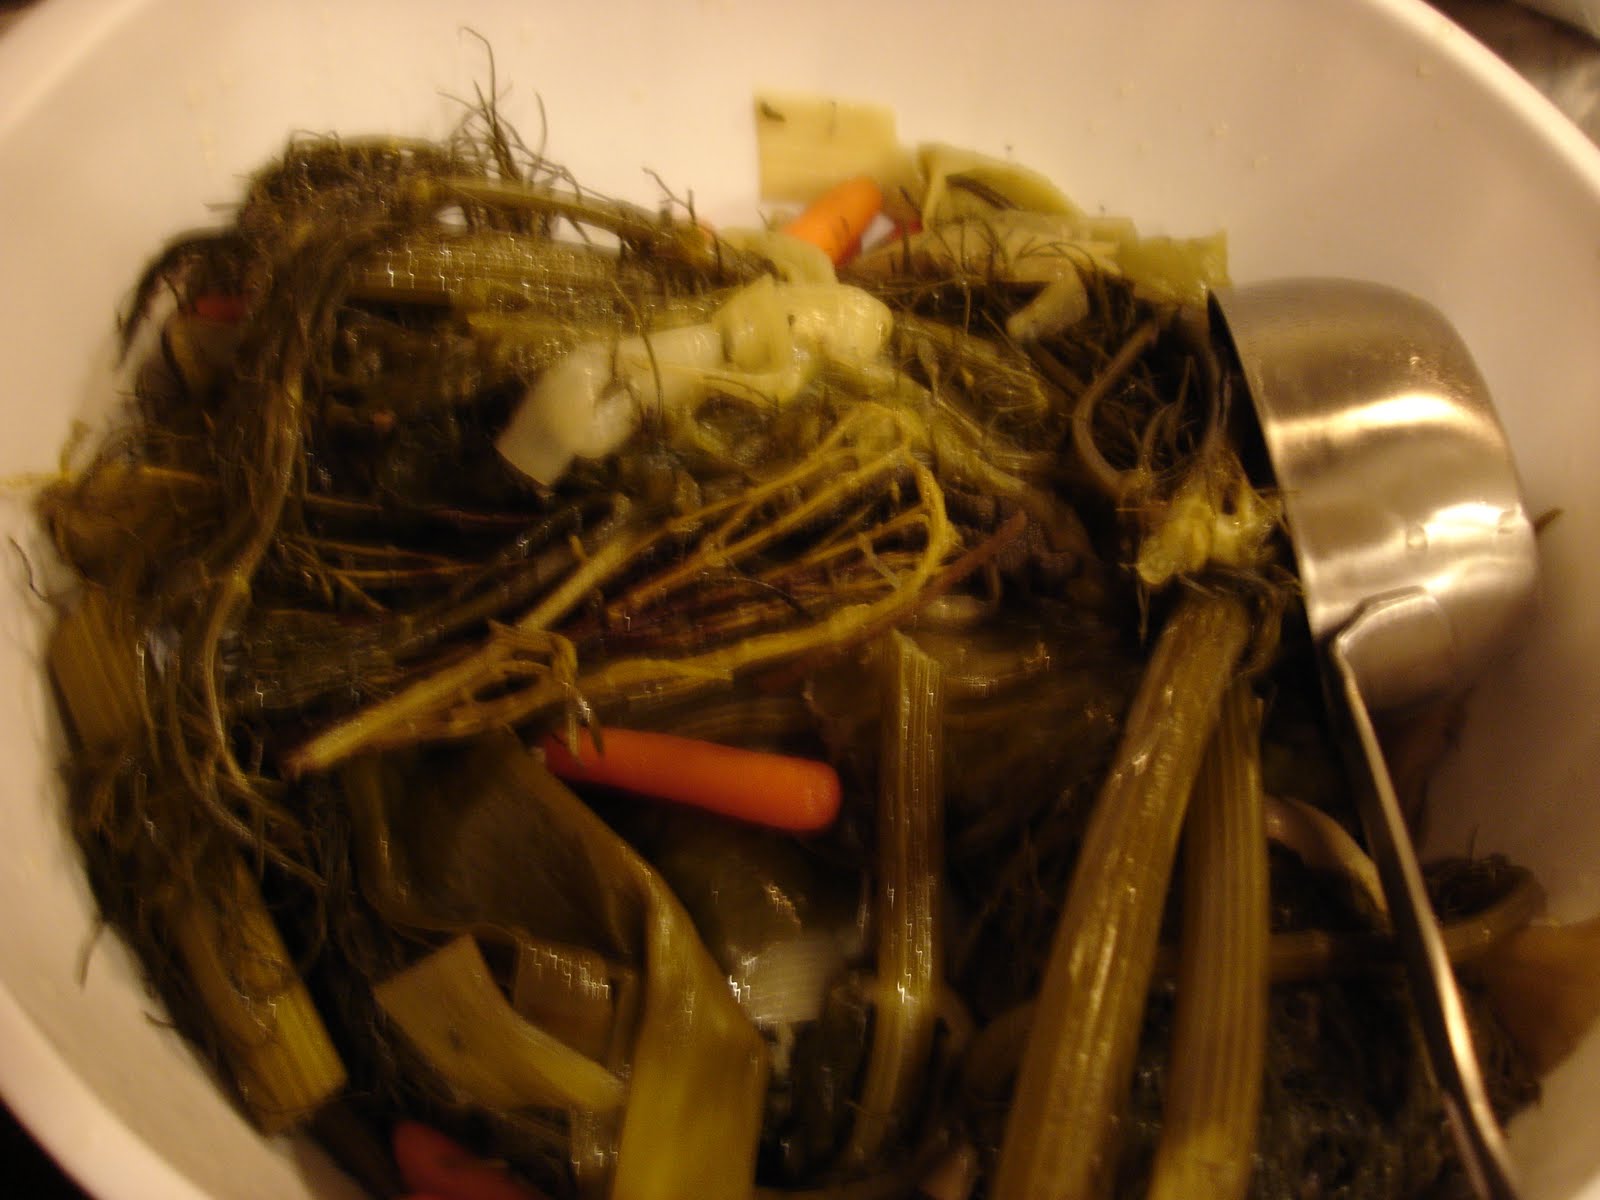
This is stock to be used in soups or stews:
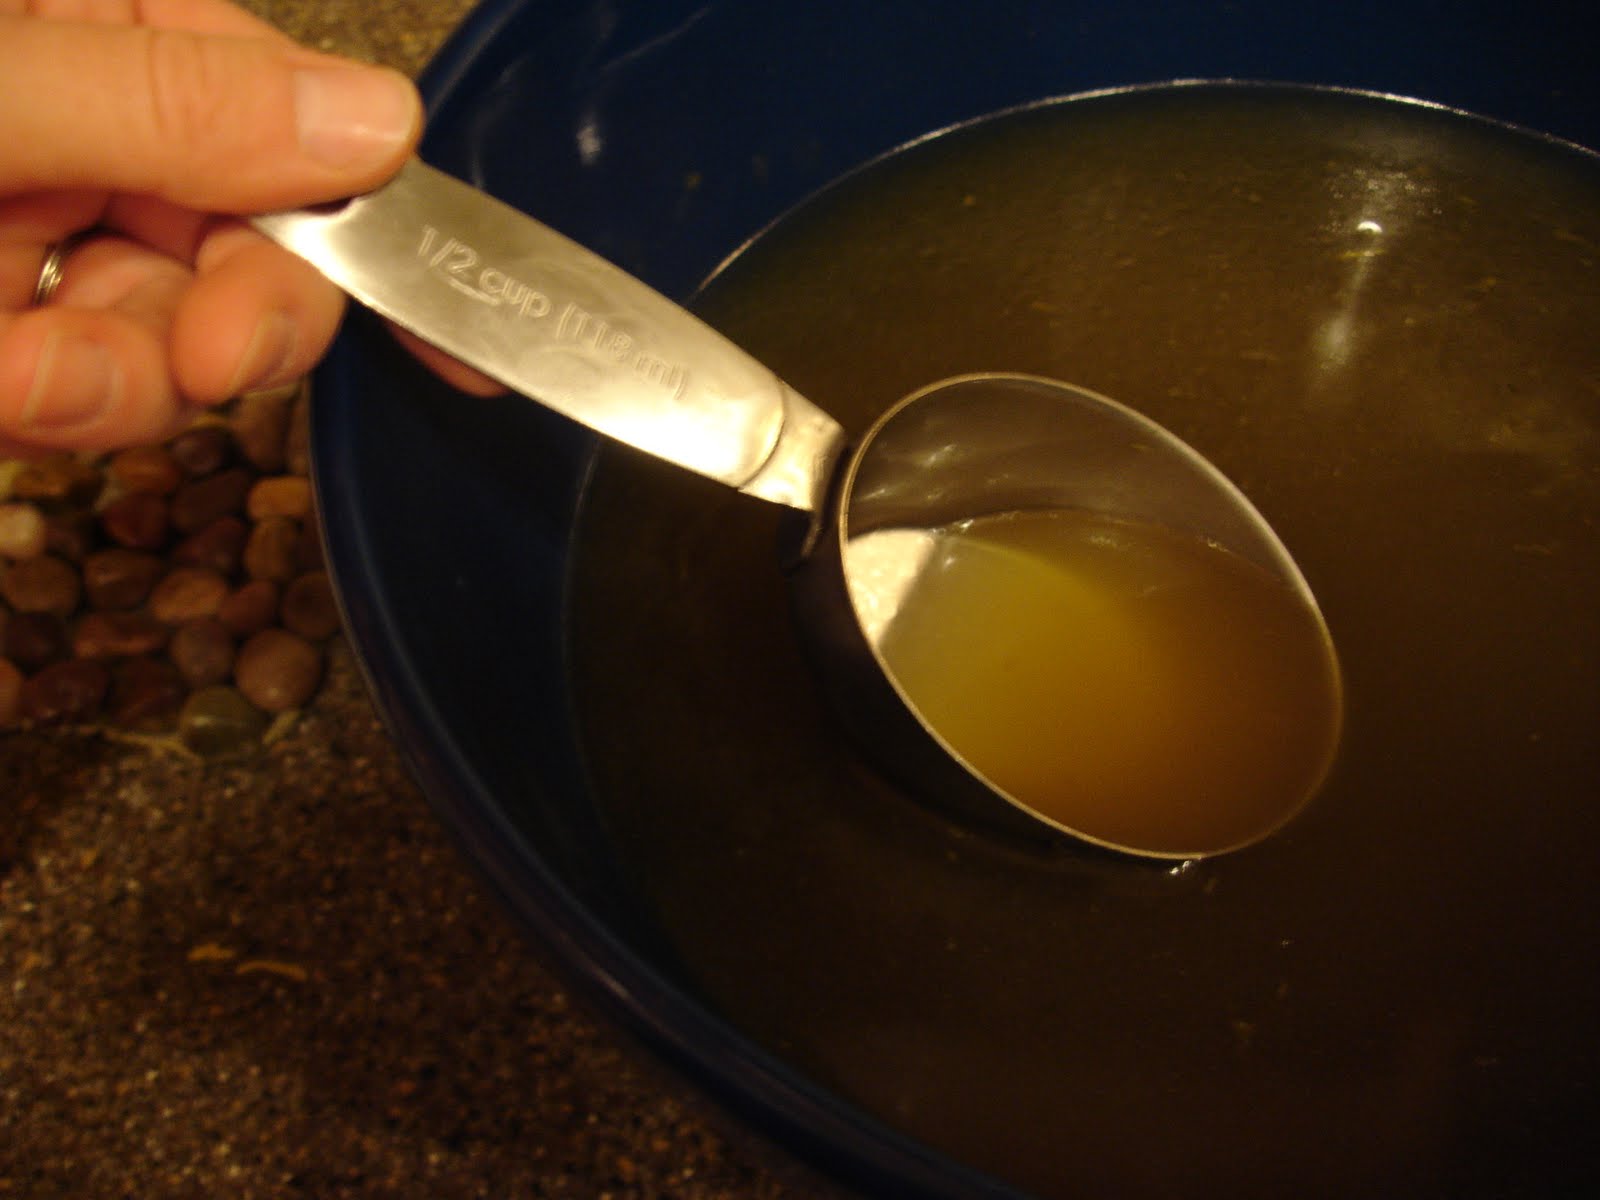 It can measured out and placed into the freezer for later use.
Have fun cooking!
Tuesday, October 25, 2011
On the Eve of Pumpkin
Series: Produce Box, October 25, 2011 Deliver; Published Blog 11
The arrival of a new season brings in new crops. The weather has gotten a little cooler in the mornings and evenings. We have less daylight and more clouds. I love the changing of vegetables in my produce box. It inspired me to try my hand at a new recipe an Old Fashion Pumpkin Cookie.

Check out the list of vegetables I retrieved from my morning porch as I wiped the sleep from my eyes:
- A Sugar Pumpkin Squash
- 2 Garnet Sweet Potatoes
- 1 Large Yellow Onion
- Broccoli
- Celery
- Carrots
- Baby Bok Choy
- Collards
- Nantes Carrots
- Kale
- Fennel
- Green Leaf Lettuce
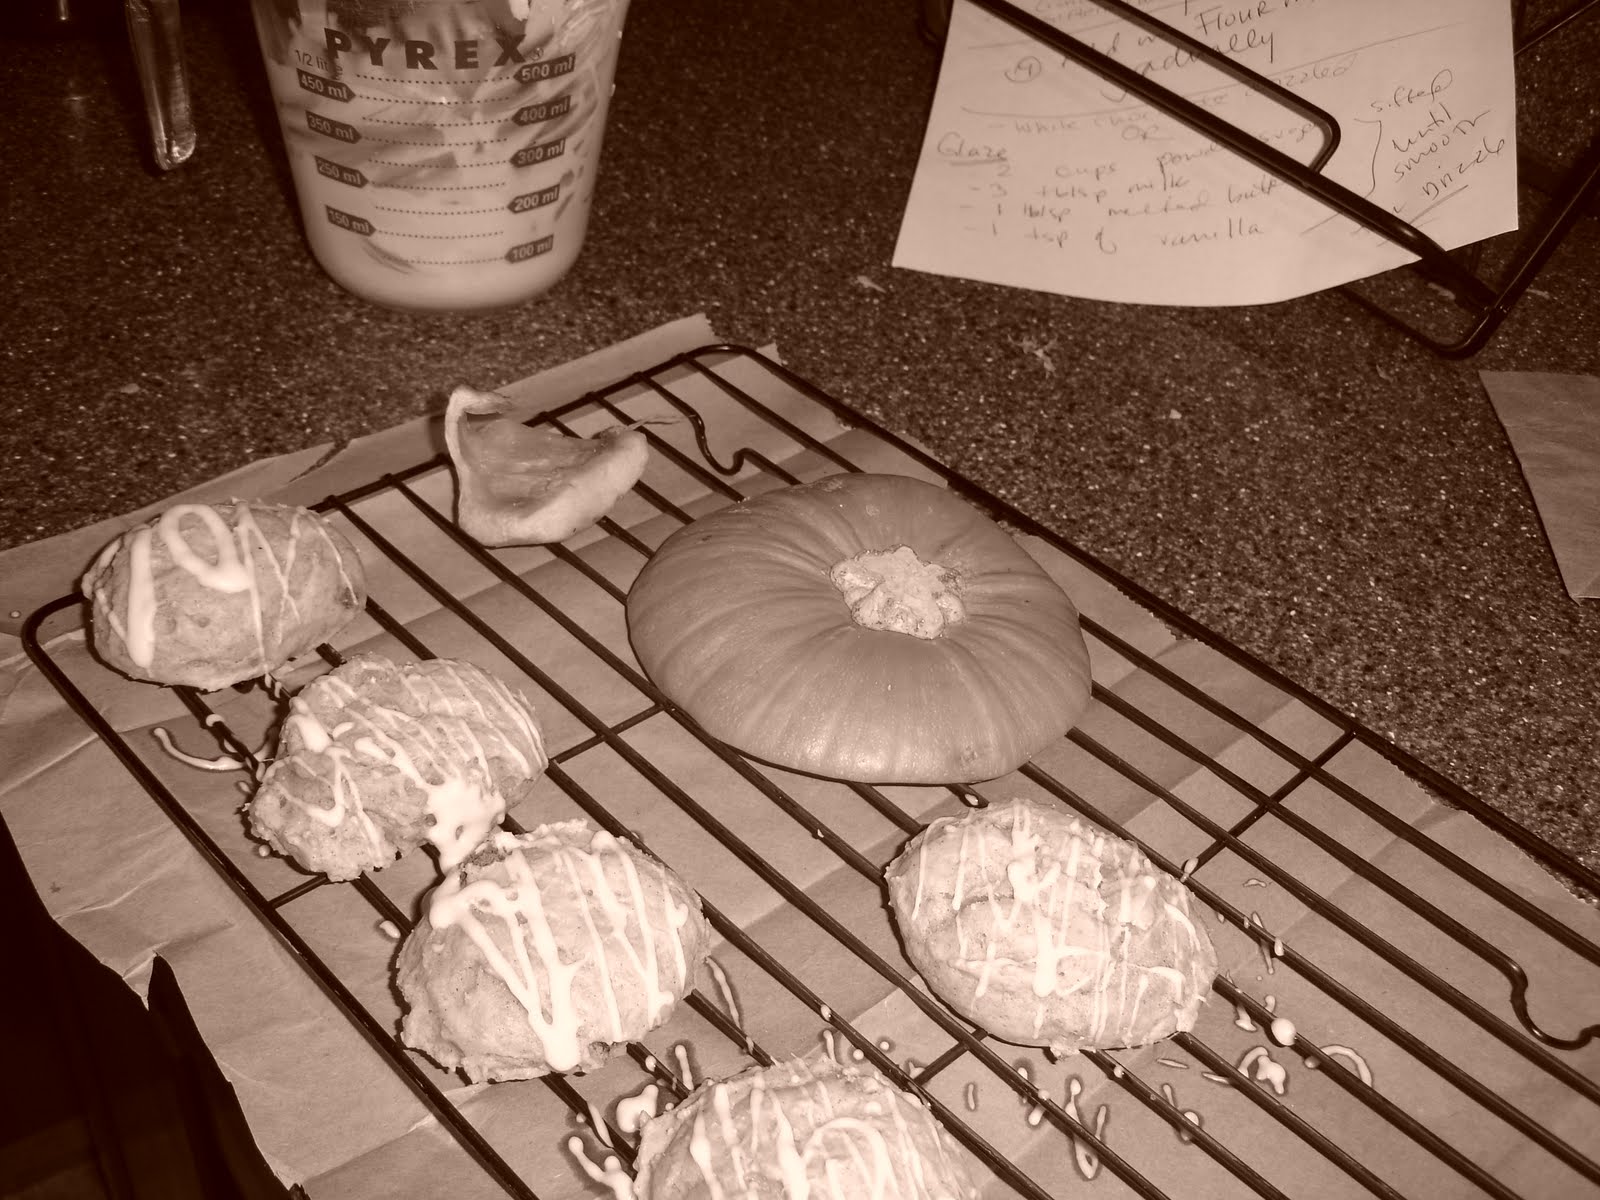
I am fascinated with a good pumpkin recipe especially during the autumn season. This year a recipe for Old Fashion Pumpkin Cookies and a Sugar Pumpkin squash both happen to be gifted to me on a fine evening. I figure it is a present from the Halloween Fairies and I gladly accept with much gratitude.
I pass this gift on to you to enjoy with your family.
Old Fashion Pumpkin Cookies
Step One

Baked Puree Pumpkin
Preheat Oven to 350 degrees.
Cut into small wedges.
Remove seeds.
Bake for about 50 minutes.
Remove oven and let it cool.
Carefully slice the hard pumpkin off.

Add the pumpkin pieces to a Cuisinart and puree.
The arrival of a new season brings in new crops. The weather has gotten a little cooler in the mornings and evenings. We have less daylight and more clouds. I love the changing of vegetables in my produce box. It inspired me to try my hand at a new recipe an Old Fashion Pumpkin Cookie.

Check out the list of vegetables I retrieved from my morning porch as I wiped the sleep from my eyes:
- A Sugar Pumpkin Squash
- 2 Garnet Sweet Potatoes
- 1 Large Yellow Onion
- Broccoli
- Celery
- Carrots
- Baby Bok Choy
- Collards
- Nantes Carrots
- Kale
- Fennel
- Green Leaf Lettuce

I am fascinated with a good pumpkin recipe especially during the autumn season. This year a recipe for Old Fashion Pumpkin Cookies and a Sugar Pumpkin squash both happen to be gifted to me on a fine evening. I figure it is a present from the Halloween Fairies and I gladly accept with much gratitude.
I pass this gift on to you to enjoy with your family.
Old Fashion Pumpkin Cookies
Step One
Combine in a bowl the following:
2 1/2 cups flour
1 teaspoon baking powder
1 teaspoon baking powder
1 teaspoon cinnamon
1/2 teaspoon nutmeg
1/2 teaspoon of salt
Mix and set aside.
Step Two
In your mixing bowl add 1 1/2 cups of sugar and 1 cup puree pumpkin (See recipe below.)
Whisk together.
Add in 1/2 cup (1 stick of butter) of softened butter
Then beat in the 1 large egg and 1 teaspoon of vanilla.
Step Four
Add the flour mixture into the pumpkin mixture.
Step Five
Bake in a 350 degree oven for about 15 minutes. The tops should be solid to touch and bottoms a light shade of brown.
Step Six
Swizzle white chocolate over the tops.
Step Seven
Open mouth, bite down for a moist cookie with a hint of cinnamon and pumpkin delicately warming you up for the cool evening night.
Baked Puree Pumpkin
Preheat Oven to 350 degrees.
Cut into small wedges.
Remove seeds.
Bake for about 50 minutes.
Remove oven and let it cool.
Carefully slice the hard pumpkin off.

Add the pumpkin pieces to a Cuisinart and puree.
Wednesday, October 19, 2011
Ready for a bowl of Chili?
Over the years, I've worked on making a bowl of chili to my taste but more so because I LOVE CHILI CHEESE FRIES WITH BBQ SAUCE. It is simply delicious. (Well anything with BBQ sauce taste great.)
So here is my chili recipe that can be flexible for those meat eaters or vegetables only eaters basically a flexitarian recipe. My recipe can be a little time consuming but I figured out some short cuts for those with time commitments around the dinner time.
Meat (or Meatless) Chili
Preheat your stew pot.
For vegetarian version:
Add in your dry spices without oil. - Chili Powder, Cumin, Salt, Garlic powder, Cayenne, Pepper.
Turn down the heat a little to below medium.
Allow the mixture to softened but don't let the garlic burn.
Short on Time- Easy Method:
The easy method is opening cans;however, for those interested in making your own 15 bean refried beans, chicken stock , or using own homemade stewed tomatoes recipes.
- Open 1 can (14.5 ounces) organic fire roasted diced tomatoes with green chilies
Testing the beans. Remove one from the pot very carefully. When you bite into it, it should be soft. If there is a tiny bit of hardness to it, it will not become soft when you smash it. So make sure that when you think it is done, it should smash easily between your teeth.
Once the beans are done, remove from heat, remove garlic cloves and peppers (if you added) and grab your smasher!
Let your strength smash the beans-- transforming into refried beans. It might turn a little gray but don't worry. Season if necessary!
I don't recook them in oil but I add it into chili or burrito stuffing.
Chili Tacos
So here is my chili recipe that can be flexible for those meat eaters or vegetables only eaters basically a flexitarian recipe. My recipe can be a little time consuming but I figured out some short cuts for those with time commitments around the dinner time.
Meat (or Meatless) Chili
Preheat your stew pot.
For vegetarian version:
Add in your dry spices without oil. - Chili Powder, Cumin, Salt, Garlic powder, Cayenne, Pepper.
Once the spices have heated up. Follow to "Add in a little oil...."
For meat lovers:
Add in about a tablespoon of oil. Then add in your ground turkey (beef or pork or chicken)
While the meat browning- sprinkle your seasonings of chili powder, cumin, salt/pepper, cayenne.
Flip the meat and break it up until almost cooked. (I do not cook the meat all the way because when you add it back into the pot it will finish cooking.)
Remove from the heat and drain (if necessary).
Set aside. It will be added in towards the end of the cooking time.
For both versions:Turn down the heat a little to below medium.
Add in about 2 tablespoons of oil.
Add in your cubed onion. Cook until clear.Add in 2 teaspoons of minced garlic.
Add in diced pepper (optional.)Allow the mixture to softened but don't let the garlic burn.
Short on Time- Easy Method:
The easy method is opening cans;however, for those interested in making your own 15 bean refried beans, chicken stock , or using own homemade stewed tomatoes recipes.
- Open 1 can (14.5 ounces) organic fire roasted diced tomatoes with green chilies
- Open 1 can (16 ounces) organic refried beans
- About 2 3/4 cups of organic chicken broth (vegetable broth for vegetarian)
Add in additional seasonings to taste...
For smokey sweet flavor: Add in smoke liquid, Worcestershire sauce, barbecue sauce (2 tbsp) and 1 tablespoon of brown sugar.
Bring the chili to simmer over low heat for about an hour. Remember to stir every 15 minutes and scrap down the sides.
Finally when you think it's almost done.
Add in your ground meat for those meat lovers and allow it to simmer a little longer until meat is fully cooked.
Turn off heat and leave on stove top to cool.
Taste test but don't forget to blow on the spoon! Adjust seasonings if necessary.NOTES:
Added measurements in case you make your own homemade versions of canned items.
Organic versions can be used for this recipe.
For chili cheese Fries with Barbecue Sauce:
Cook fries according to package. I like them a little extra crunchy.
Spread french fries on a plate and spoon the chili on top.
Add a few swirls of barbecue sauce.
Enjoy with a fork!
Homemade Refried Beans
Making your own homemade refried beans isn't hard. I found through trial and error that it makes a difference in the chili. One thing I found helpful is soaking the beans. I do not recommend the quick couple of hour soak or placing them in a crock pot thinking they will cook. You might be a little disappointed. Just plan ahead the night before!
Soak the beans for 24 hours. Change water at least twice.
Heat up the pot on medium heat.
I like to flavor my beans depending on what recipe I will use them in.
For a chili recipe: I used chili powder and cumin. Season with pepper and salt.
Add in oil.
Drain the beans and add them into the pot. It will sputter with steam.
Stir and Pour water back into the pot to cover the top of the beans. I add about an inch of the top. It will boil away.
At this point you can optionally add in cloves of garlic and peppers to flavor the water.
The beans should be simmering/boiling.
There is a balance of heat that should be found to make sure your beans are becoming tender and the liquid is slowly evaporating. If the water gets to low add about a cup of water back in.
Stir.Testing the beans. Remove one from the pot very carefully. When you bite into it, it should be soft. If there is a tiny bit of hardness to it, it will not become soft when you smash it. So make sure that when you think it is done, it should smash easily between your teeth.
Once the beans are done, remove from heat, remove garlic cloves and peppers (if you added) and grab your smasher!
Let your strength smash the beans-- transforming into refried beans. It might turn a little gray but don't worry. Season if necessary!
I don't recook them in oil but I add it into chili or burrito stuffing.
Chili Tacos

Have leftover chili? Here's my twist to using leftover chili and making a new dish from the last serving.
I had on hand a package of taco shells. Heat according to package.
I heated up my leftover chili.
I sprinkled cheese on the bottom.
Spooned my heated chili over the top.
Sprinkled cabbage and a little hot sauce.
Spoon guacamole or sour cream on top.
Simple meal made easy with leftover chili!
Enjoy and Have Fun Cooking!
Tuesday, October 18, 2011
Hey Batter, Batter...
Yes Folks- it is a fly ball over the left field. HOME RUN! We fried that fish...oops I mean baked the fish. Success measured in baseball is by the number of home runs a batter can achieve in a game; success in the kitchen is measured by clean plates, no leftovers, and full bellies of goodness.
My latest endeavor in cooking fish. I've attempted many different ways to cook fish for my husband who simply adores fish. Now if you know me I didn't like fish when I kid. My taste started to change when I tried fresh fish out the lake grilled on flat rocks when camping. When I got married to my fish loving husband, I tried even more to be more adventurous with fish.
After almost 13 years of marriage, fish recipes are starting to pour out of kitchen in new creations.
Parmesan Garlic Salmon
Preheat Oven to 400 degrees.
Prepare the sauce to top the fresh/thawed salmon fillet.
Sauce Ingredients:
1/2 cup of mayonnaise
1/4 cup grated Parmesan cheese
1-2 teaspoons of garlic powder
1 tablespoon of lemon juice
1/2 teaspoon of cayenne powder
pepper/salt to taste
Optional: minced chives
Blend together.
Grab a baking dish line with parchment paper.
Place fish and top with sauce.
Bake until almost flaky which takes about 20-30 minutes depending on your oven and preference.
I grabbed a picture to help remind me to make this meal again since my husband simply enjoyed the flavors of the fish & sauce blending together in each bite.
I paired the dinner with a side dish of broccoli and pasta. The pasta was a cheesy/tomato flavor.

The coolest thing about this meal -- it took only 30 minutes from prep to sitting down at the table to eat.
Have fun cooking!
Sunday, October 16, 2011
Granola Expedition
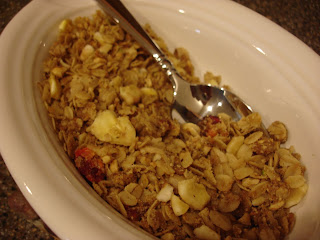
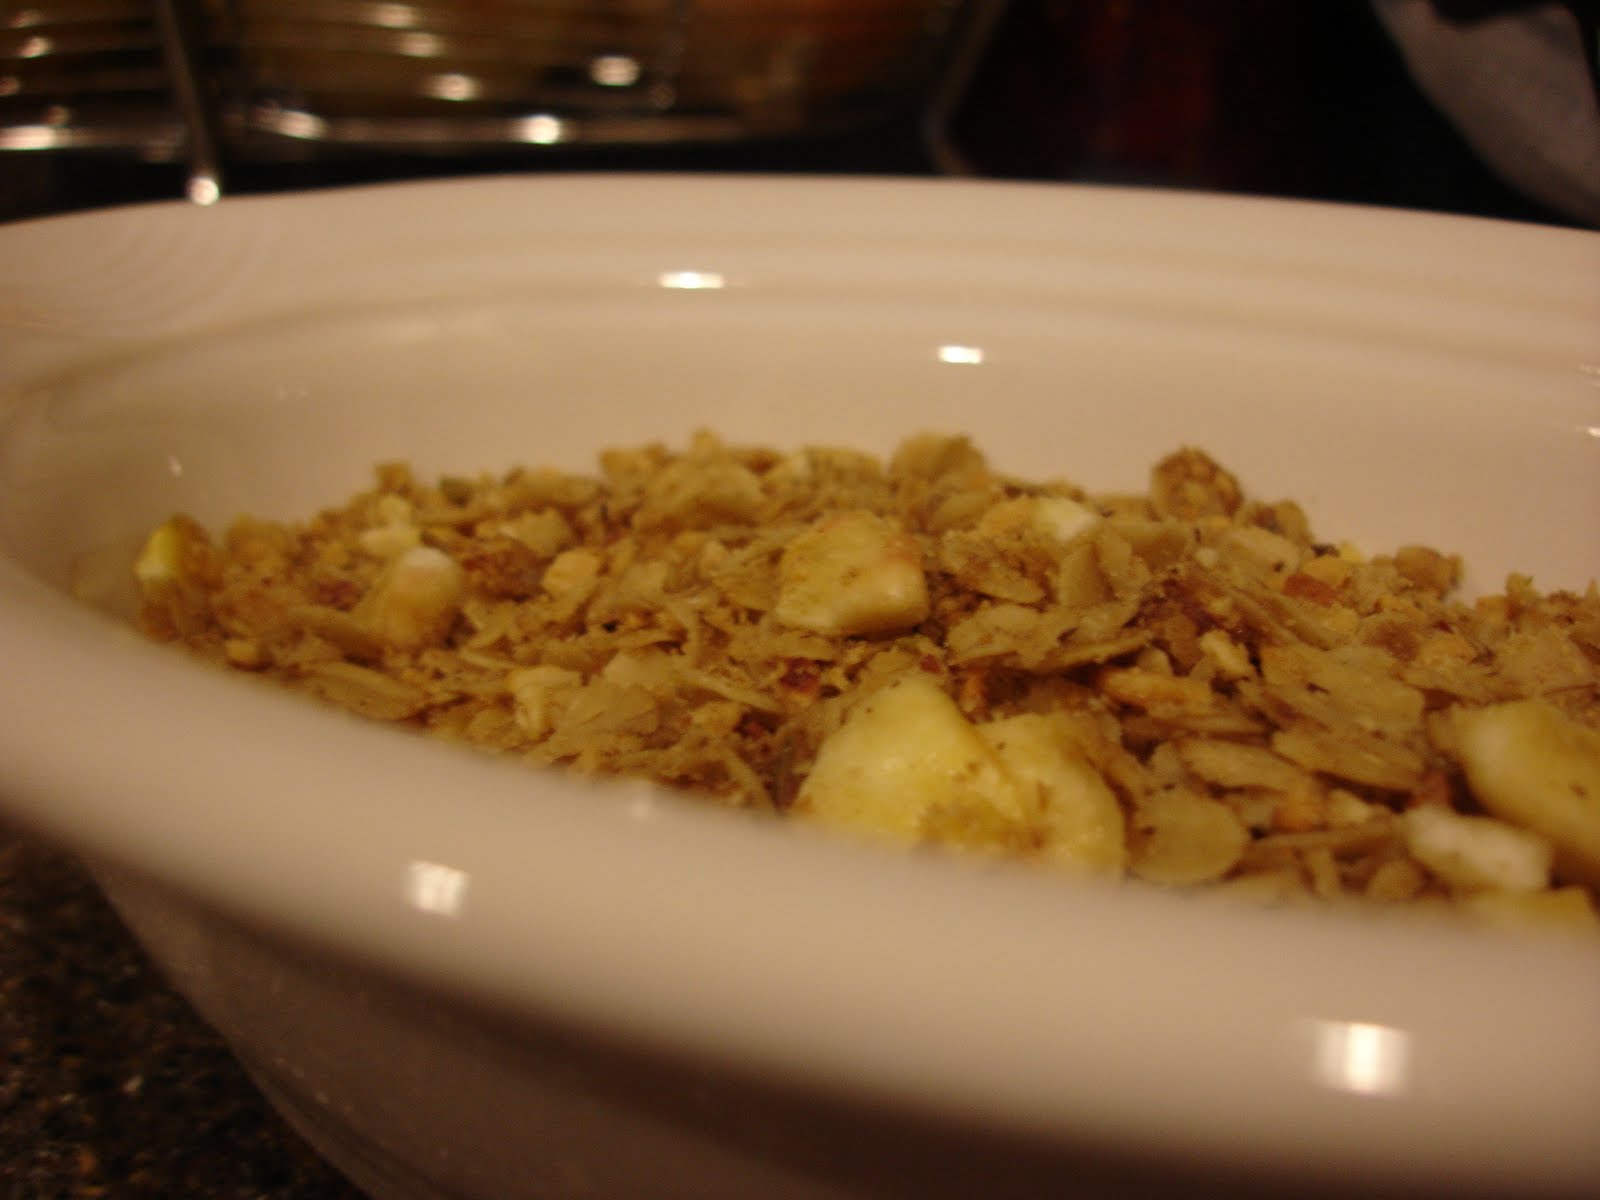
Granola Expedition
Are you hesitant about making your own granola? Not sure if it will turn out and then afraid that you would have to toss it? Or worried that when you looked up the recipe on the Internet you recognized half the ingredients were not budget friendly. Well stop worrying any further! I was in your shoes before now I am confident that I can inspire you to try my recipe. It uses flexible ingredients, relies on few ingredients, and can be kid friendly. (You can also make it with organic products.)
Enjoy and Have Fun Cooking!
Are you hesitant about making your own granola? Not sure if it will turn out and then afraid that you would have to toss it? Or worried that when you looked up the recipe on the Internet you recognized half the ingredients were not budget friendly. Well stop worrying any further! I was in your shoes before now I am confident that I can inspire you to try my recipe. It uses flexible ingredients, relies on few ingredients, and can be kid friendly. (You can also make it with organic products.)
It was late at night and I was watching the Disney channel since it was left on. I saw this recipe info commercial. It had a Chef from Food Network mentoring a few Disney kid stars on how to make granola. I hadn't written it down but I was confident that I would find it on the Internet the next day. (No luck- it's a hard recipe to track down! Lizzie's Granola.) Instead I found similar recipes that caught my fancy plus with the visual demonstration from the Disney show I thought I could try.
Granola Expedition
2 1/2 cups of rolled oats
1/4 cup of olive oil (you can choose to use canola oil or whatever baking oil you have on hand)
1/3 cup of brown sugar
1/3 cup of corn syrup (or honey)
I also ground up a 1/2 cup of mixed nuts.
1 teaspoon of cherry extract (or vanilla)
1 teaspoon of cinnamon
Toss all the ingredients listed into a bowl to stir together.
Spoon into a large rectangular glass dished.
Place in a 350 degree oven for 15 minutes. Stir.
Place back into oven for another 15 minutes or until lightly golden brown.
Remove from oven.
2nd Part: Prepare while granola mixture is in the oven.
Here's what I add my twist.
I had this leftover nut trail mix. I just got tired of eating it but didnt want it to go to waste.
So I decided to pick out the banana chips. Ground them up just a little to make it smaller pieces.
I removed the chunks of dried fruit and also ground those into smaller pieces.
Finally added the whole nuts.
Once the granola mixture is removed from the oven. Toss together to start the sugars cooling. Do it slowly for more chunks.

Tips:
More sugar in a mixture, more easier to burn.
Do not add in the nuts or dried fruit. They will burn or harden.
Enjoy and Have Fun Cooking!
Monday, October 10, 2011
Cilantro Coleslaw
Adding a new twist to a traditional recipe: Coleslaw with an Asian twist.
I eyeballed my measurements based on how much salad dressing I want to make.
Dressing:
Mayo
Olive oil
Rice Wine Vinegar
Lemon Juice
Sugar
Salt/Pepper
Cayenne
Lots of Cilantro chopped
(I'll try to develop measurements and repost later on with them.)
Slice up the cabbage into thin shreds
I also added carrots, cucumber, and sweet pepper for color!
One thing to note with coleslaw dressing as soon as the dressing and cabbage are mixed together the dressing will get a little runny and the cabbage will soften. So wait until the last minute to mix and serve.
Tuesday, August 23, 2011
Weaving in the Vegetables
Inspiration comes and goes....I am inspired by recipes that incorporate vegetables into the main course. Usually it is meat, vegetable, and carbohydrate is on our family dinner plate. My latest attempt is to find recipes that inspire a weave of the usual into something new. Here's a little inspiration for you:
Zucchini Spaghetti
Trying to cut back on your carbs? Or trying to get your kid to eat more vegetables? This is a yummy recipe for the summer.
Spaghetti and sauce will prepared as normal.
Cut zucchini into matchsticks and saute with olive oil under slightly tender. Remove and place into a bowl.
A flavoring tip: add whole peeled cloves of garlic into the pasta boiling water to enhance with a garlic flavor. Remove and smash to saute with the zucchini.
Toss the zucchini with cooked spaghetti and sauce.
Plate up with green salad and turkey meatballs for a complete meal with extra vegetables.
Here's a picture of what it looks like and what inspired me to make it....

Second menu item that I hope will catch your fancy. It weaves ground turkey, oats, and broccoli into an Asian themed burger for the indoor grill. This recipe was created in cooperation with my husband. He had the idea and I executed the recipe.
Homemade Vegetable Burgers
Mix in a bowl the following for the turkey burgers:
1lb of ground turkey
10 broccoli florets processed in the food processor (frozen broccoli will work as long as it is slightly defrosted 4 minutes at power 1.)
1/2 cup of rolled oats
For seasoning: 1 tsp of red chili paste, 1 tsp of minced garlic, 2 tbsp of soy sauce, 1/2 tsp of oyster sauce
Blend and make into patties.
I noticed the burgers are a little tender and require light touch. I also made sure to oil the side of the burger before I placed it on the grill. It seemed to help just a little.
As a side dish to my burger, I prepared a simple fruit salad with apple slices, orange wedges, and fresh blueberries.
From my family dinner table to yours- Enjoy!!
Thursday, June 9, 2011
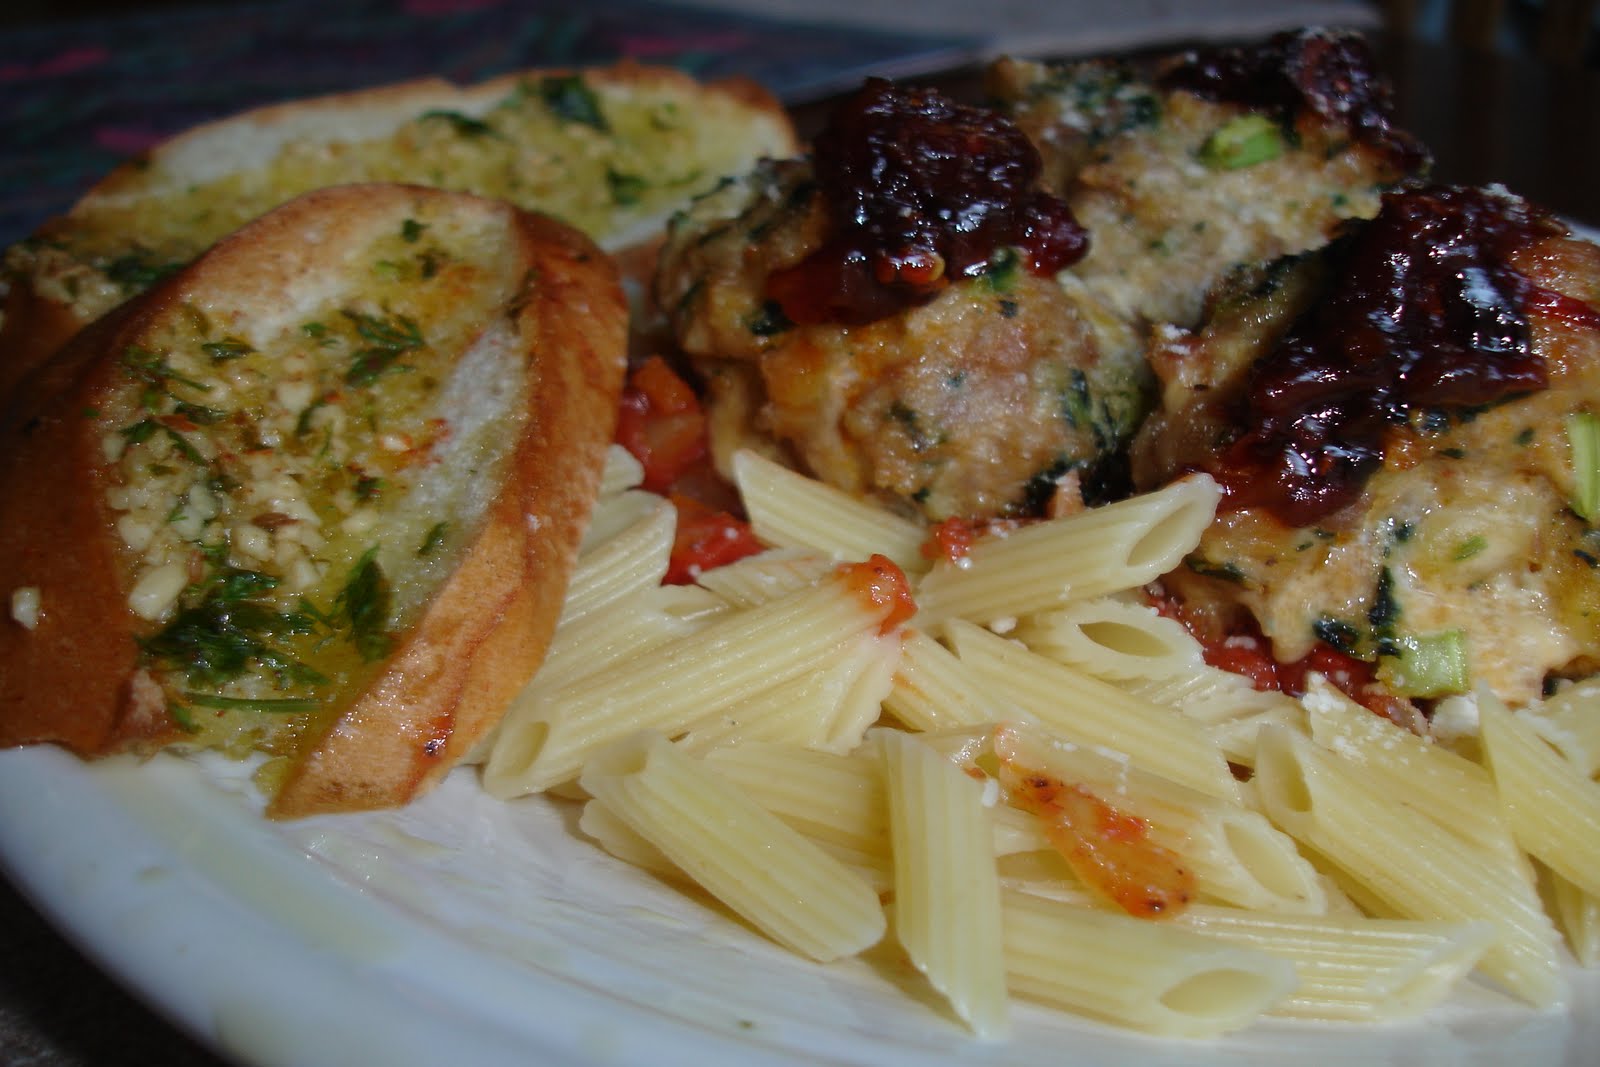
Turkey Meatloaf Muffins Topped with Bacon Jam
This recipe makes my mouth water. It is an easy portion controlled meal making you grin with satisfaction.

Meatloaf Muffins Topped with Bacon Jam
Preheat oven to 375 degrees.
Grab a pound of ground turkey.
Add it to a bowl with 2 slices of bread torn in pieces, 1 egg, 1/2 onion diced, 1 stalk of celery diced, a tablespoon of Worcestershire sauce, and season with pepper and salt.
Smoosch together so the mixture looks well blended.
Scoop about 1/4 cup into a 12 count muffin pan or distribute 1/2 cup mixture into 6 count jumbo muffin pan.
Place in oven until 5 minutes more to cook. Top with the Bacon Jam mixture (recipe to be posted later.)
The meatloaf will be done when the internal temperature reaches 160 degrees.
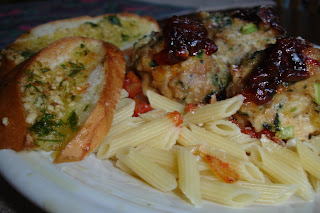
Dish up with a side of mini penne with a fresh tomato sauce and garlic bread.
Enjoy!

Meatloaf Muffins Topped with Bacon Jam
Preheat oven to 375 degrees.
Grab a pound of ground turkey.
Add it to a bowl with 2 slices of bread torn in pieces, 1 egg, 1/2 onion diced, 1 stalk of celery diced, a tablespoon of Worcestershire sauce, and season with pepper and salt.
Smoosch together so the mixture looks well blended.
Scoop about 1/4 cup into a 12 count muffin pan or distribute 1/2 cup mixture into 6 count jumbo muffin pan.
Place in oven until 5 minutes more to cook. Top with the Bacon Jam mixture (recipe to be posted later.)
The meatloaf will be done when the internal temperature reaches 160 degrees.
Dish up with a side of mini penne with a fresh tomato sauce and garlic bread.
Enjoy!
Sunday, February 13, 2011
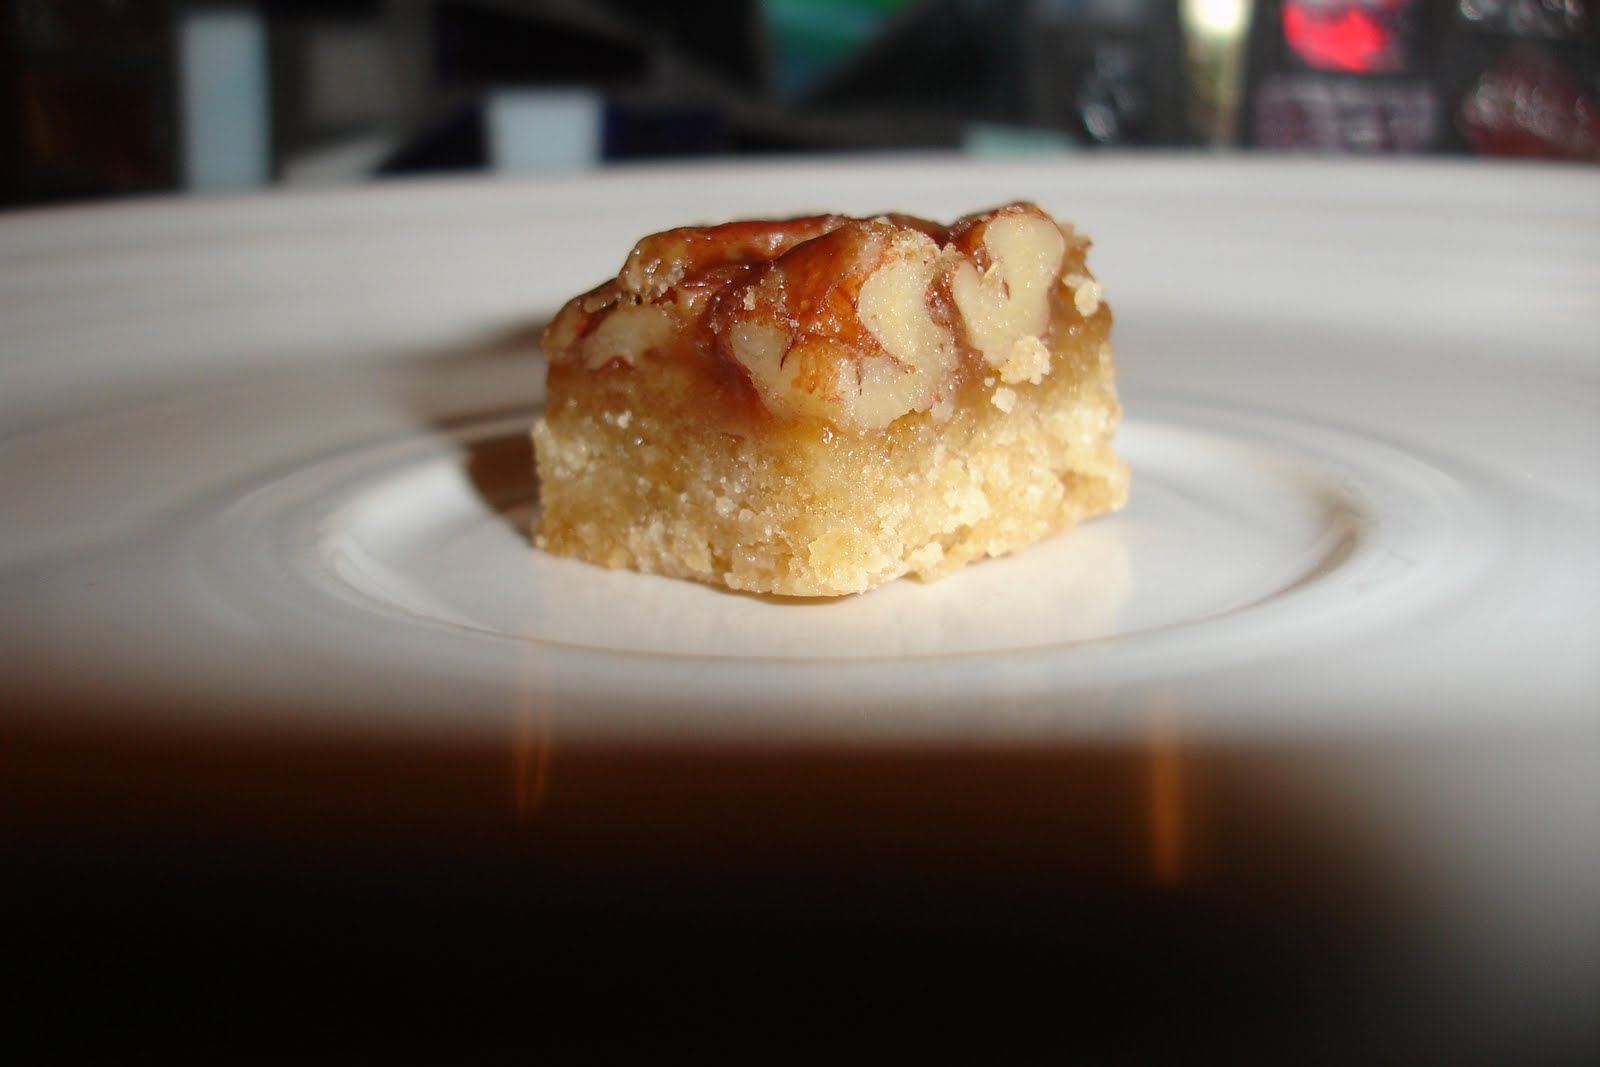
Easy Pecan Bars
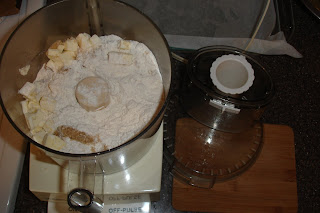
Pecan Bars
An adapted recipe selected from one of my favorite cook books: Food for Friends by Sally Pasley Vargas
Pulse until a powdery substance.
Prepare your baking dish a 9 by 13 works fine. Line with parchment paper. Cut and fold to the pan.
An adapted recipe selected from one of my favorite cook books: Food for Friends by Sally Pasley Vargas
Recipe is divided into two layers.
Bottom Layer:
Preheat your oven to 350 degrees.
Add the following ingredients into a food processor:
1 ½ cups of all-purpose flour
6 tablespoons of brown sugar
Salt to taste
1 stick of butter
1 teaspoon of vanilla

Pulse until a powdery substance.
Prepare your baking dish a 9 by 13 works fine. Line with parchment paper. Cut and fold to the pan.

Pour the mixture into the pan.
Use your clean hands to pat to evenly compact the bottom layer.
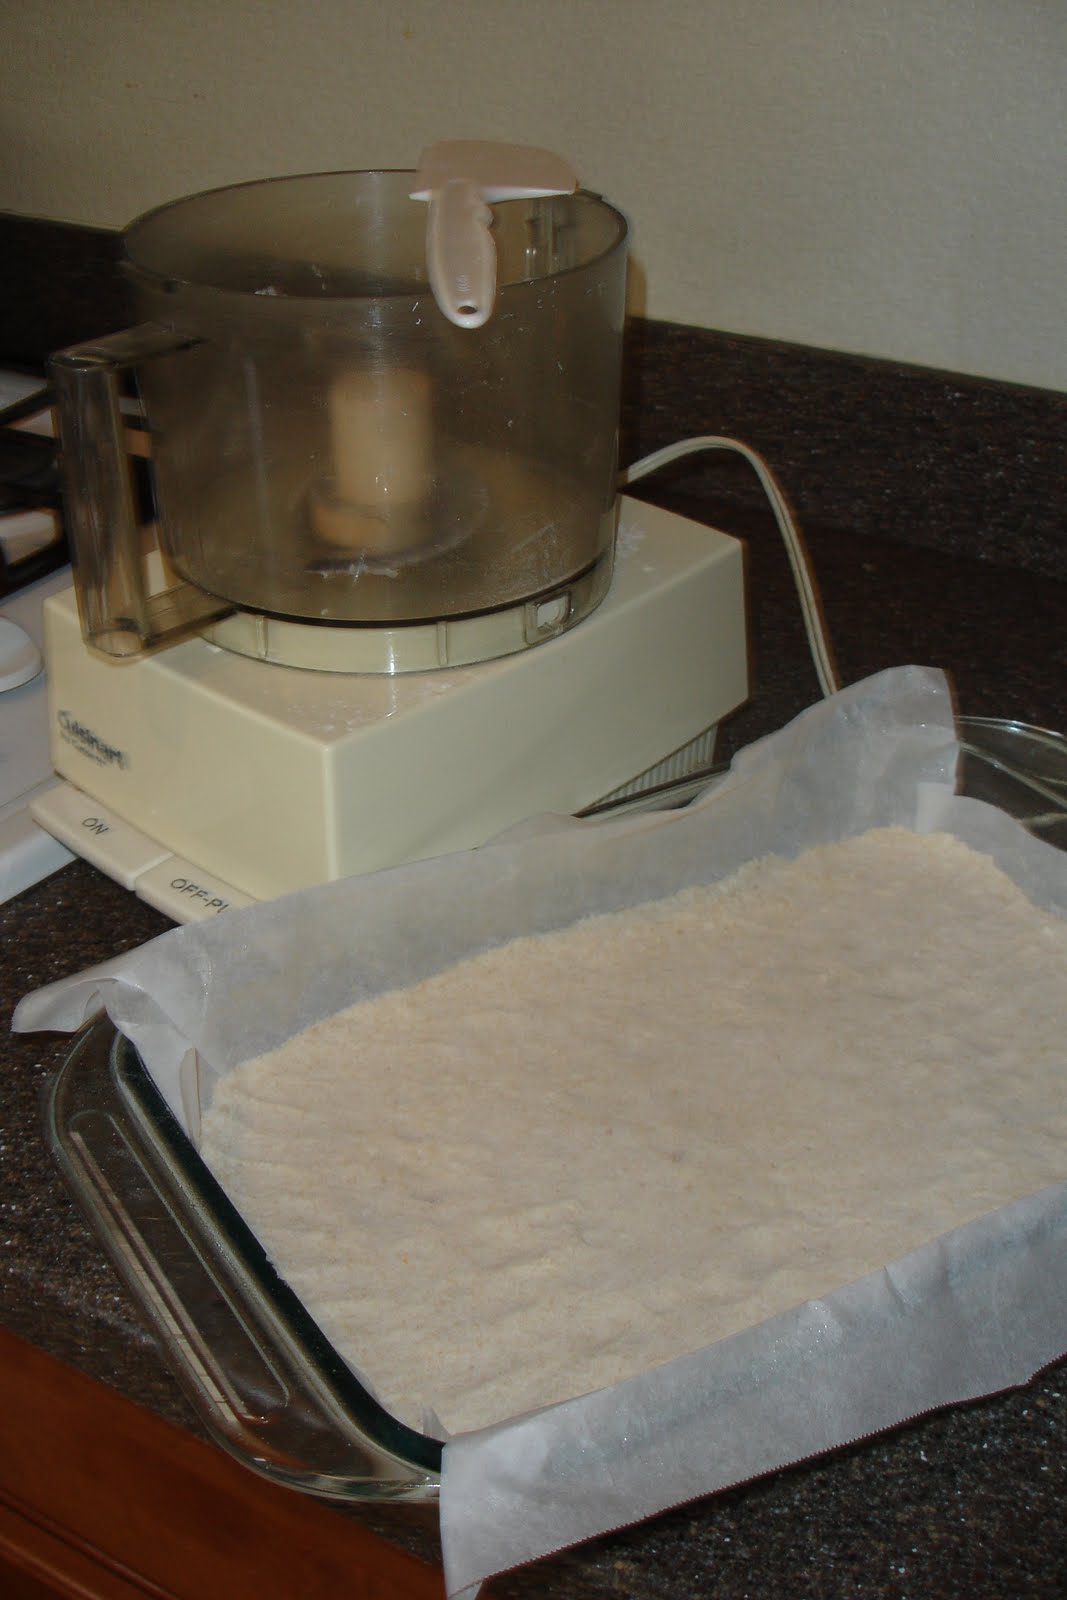
Bake in the oven for about 10-12 minutes. Remove from the oven when done.
Top layer:
Grab a thick bottom small saucepan. Add in the following ingredients:
1 stick of butter
½ cup of brown sugar
½ cup of dark corn syrup
1 teaspoon vanilla
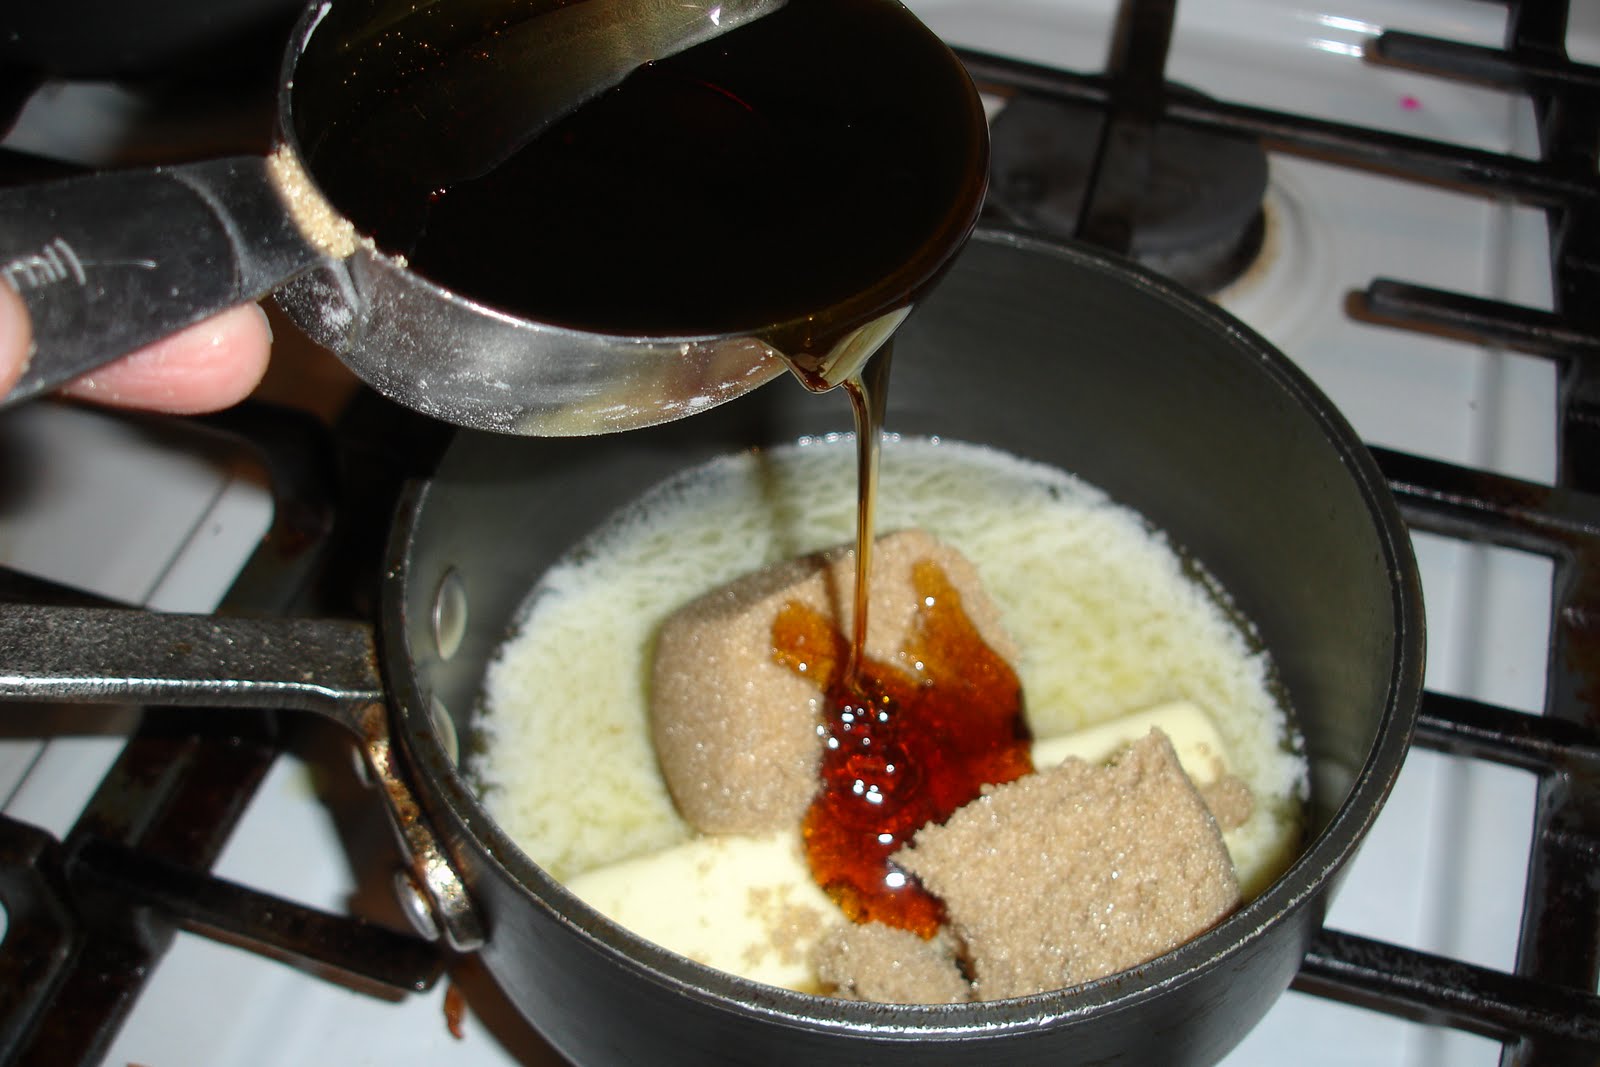
1 tablespoon of heavy cream
(My substitute: 1 tablespoon of powder milk and 1 tablespoon of butter)
Stir over medium heat to melt butter.
Continue to stir as you turn up the heat to bring to a boil.

Let it boil for 1 minute without stirring.
Pour over the baked bottom layer.
Sprinkle about 2 cups of pecans over the top of the top caramel mixture layer.

Place back into the oven for about 20-25 minutes or until the topping is uniformly bubbly.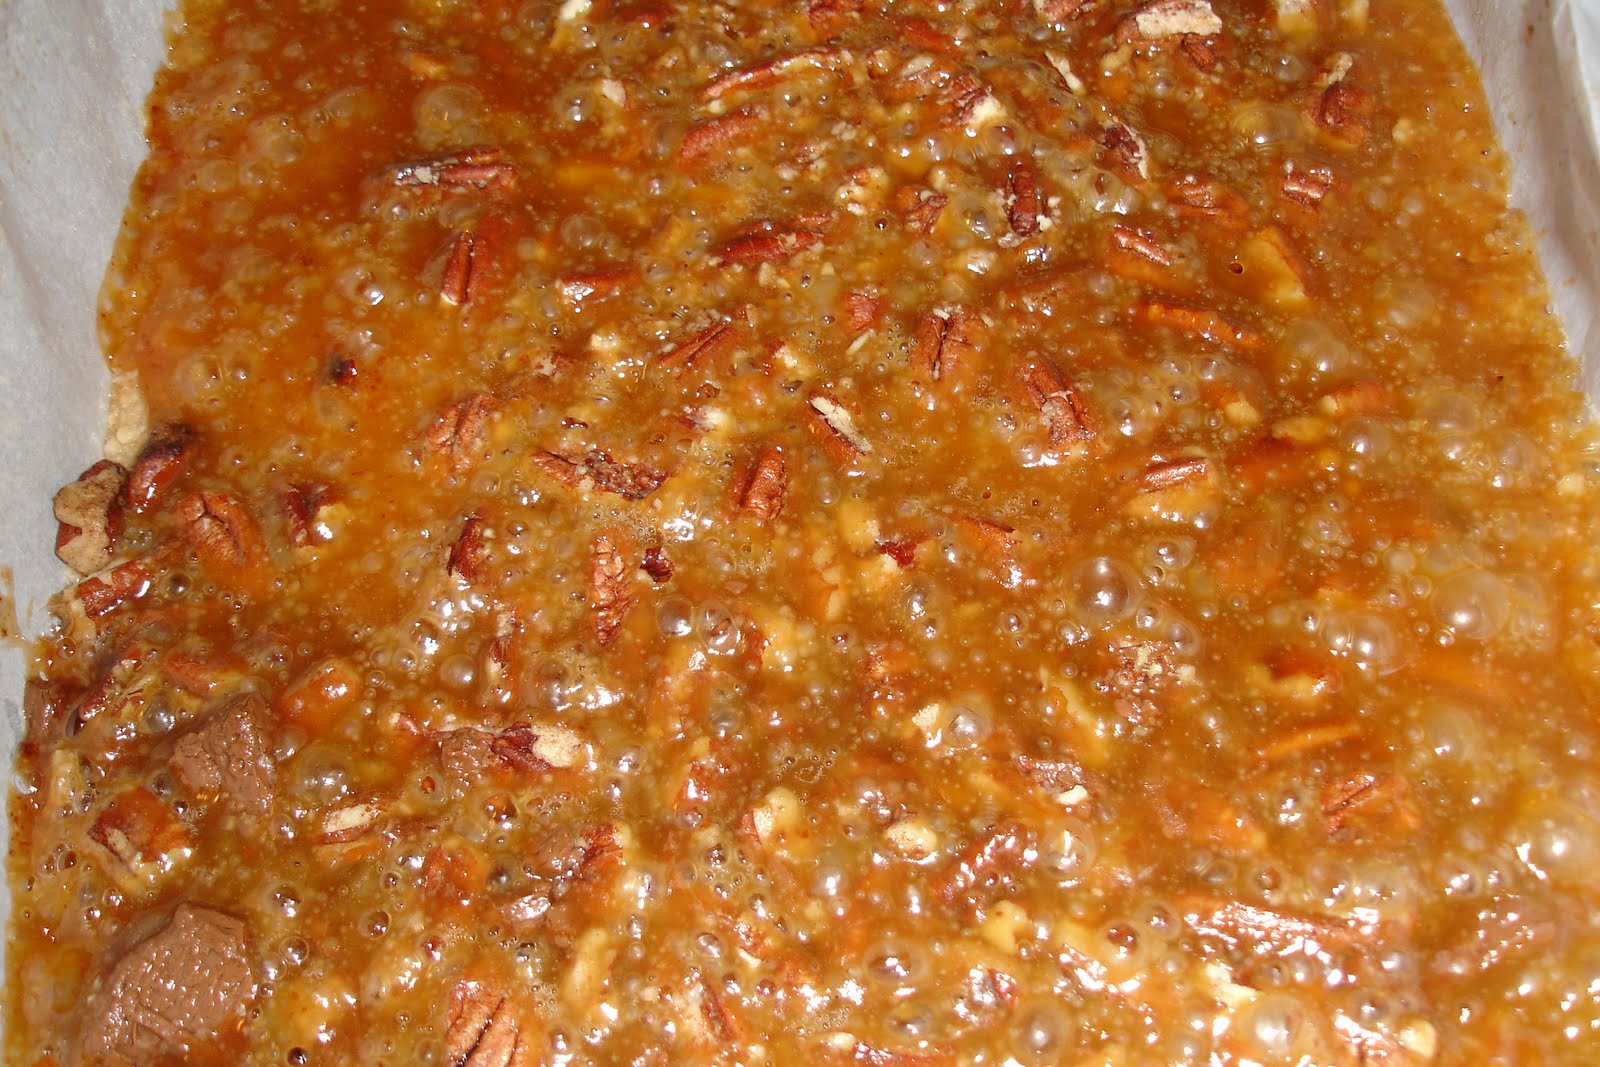
*Please use caution when you remove this dessert from the oven. It will be very hot.*
Remove and aside to cool. Let the caramel topping cool and solidify to touch prior to cutting into bars. It takes about 15-20 minutes to cool.
Wednesday, February 9, 2011
Your Taste Buds Will Adapt

In reflection while cooking a stir fry today, I realized that I've started to enjoy kale, chard, and collard greens. Prior to receiving a produce box, I hadn't really thought to purchase kale, chard, collard greens, or even butternut squash on a regular basis at least not twice a month. This sums up the fact the more you give it a try then better chance that you might like eating it.
So here are my salutes to new vegetables creeping into my life and my family eating habits. My first recipe is to make saute greens.
Saute Greens
Grab about a 3-4 leaves of kale and 3-4 of chard.
Remove the stem down the middle of the leaf. This is really tough and will not make for pleasant eating.
Next roll up the leaves. Slice the into thin strips. Soak the greens in a bowl with water. Rinse. Set aside.
Slice up an onion.
Grab out a nonstick saute pan with a lid. Heat on medium heat. Add olive oil. First caramelize your onions. Remove them.
Drain the oil back into the pan. Make sure the pan is nicely warm.
Remove the greens from the bowl of water and place into the saute pan.
Cover and let it steam until the leaves wilt.
Stir.
Season with a little salt and pepper to taste.
Remove the lid and let it simmer off the access liquid.
Add back in the caramelized onions.
Stir.
Get ready for delicious greens and pair up with a meatloaf muffins, tater tots, and a fruit salad to make a great family dinner.
My recipes have transformed to incorporate these greens into my menu.
Wednesday, January 26, 2011
Everyday (Birthday) Cakes
As far as I can remember I loved looking through cook books. I think I was somewhere in 3rd or 4th grade when it came into my sister's and mine possession. It was when we really started to learn about cooking and took an interest in our food presented on the dinner table.
There was this one cookbook that I fondly remember as a kid that was especially for kids. Inside was a pretty picture of a chocolate cake with a design and balloons in the background associated with birthday parties.

(One thing I've learned through the years is that the picture may look pretty but it doesn't make the food taste any better once it is made.)
Eventually one day I found a recipe that sounded good with what I imagine a yellow cake to taste like with chocolate butter cream frosting. I stumbled upon a website ( King Arthur Flour) that provided an easy homemade golden vanilla cake. I use to receive their magazines and I remember the recipes within them but forget to clip them out. Well low and behold, they are now on a website with pictures!
Since it was my husband's birthday, I wanted to try it out but I checked with him to see if he would rather have oatmeal cookies with a marshmallow filling. The cake won!
Anytime I am going to plunge into the kitchen to start cooking, I like to write down my instructions and ingredients. This helps tremendously in making sure I don't miss a step. Sure- I could have printed it out and read it before trying it; however, the process of re-writing the recipe helps imprint it in my memory. I strategize on what steps to take. I group my ingredients and methods.
As soon as I got home from work, I started my task after being barreled down my two 40 pound puppies. I tied my hair back, pushed up my sleeves, put on my apron, and washed my hands. I was ready to start cooking! Since I had both desert to make and a dinner to cook, I acted upon an important piece of advice: Mediate a minute just to put into perspective the timing of a meal plan.
Thoughts that go through my head...
What needs to be done first?
What is second? If I get this task done, what is my next?
Can I overlap cooking times for a meal?
Timing is crucial in the kitchen. If the timing goes well it translates to sitting down for dinner at our regular scheduled time. Just like a restaurant, the guests like to have their meal at a certain time. So I treat my family the same way because in reality the body likes routines and starts the digestion process in the same timely manner each day.
Preheat 350 degrees.
In a large bowl- whisk together the following:
2 cups of sugar
3 1/4 cups of flour
2 1/2 teaspoons of baking powder
1 teaspoon of salt
Next- grab your very soft butter and your hand mixer.
3/4 cup butter, softened
Mix this with the dry ingredients and it will turn the mixture sandy.
Grab the milk and vanilla.
1 1/4 cup milk, room temperature
2 teaspoons of vanilla
Add all at once and turn on the hand mixer - 30 seconds at low, 30 seconds at medium.
Scrap down the sides.
Grab your eggs. I place them in warm water to bring them to room temp.
4 eggs
Crack 1 egg at time and add into the mixture. Blend for 30 seconds. Scrap time the sides. Repeat this process 3 times.
With the last egg cracked and added. Turn on the mixer for 30 seconds on medium high.
Time to pour your batter.
You can choose to use either cupcake pan or bundt or cake pans. It just depends what you would like. Just make sure to use parchment paper or cupcake holders.
Place in the oven and bake until just about light brown.
Remove from oven and set aside to cool. Once it pulls away from the side a little, remove from the pans and place on a cooling rake.
Chocolate Butter cream Frosting
The frosting to top it off. I found this recipe after a quick google search. I decided to halve the recipe as I went along. Seriously what do you do with too much frosting and in my case I'm not a big fan of the sugary topping. So I tried to make it to my liking. I taste tested it along the way. I found this important but I went into a sugar shock at certain moments.
It helps to use room temperature butter and room temperature milk. A microwave can assist if you run out of time but make sure not to let the butter get too melted into soupy liquid phase.
Place into the mixing bowl:
1 stick of butter, cut into pads.
3 cups of powder sugar
3 Tablespoons of milk
1 teaspoon of vanilla
1/8 teaspoon of salt
Use the hand blender on low and let it blend together for about 30 seconds. About a little bit more milk if it is too chunky. Smooth it out just a little with about 30 seconds more.
Chocolate- I used my unsweetened cocoa powder. On the side of the package, it provides a chocolate square equivalents= 3 Tablespoons cocoa + 1 Tablespoon canola oil
I grabbed a small pot and heat it up on low. Added in 6 Tablespoons of cocoa powder and 2 Tablespoons of canola oil. I mixed it together until it became smooth and warm.
Pour it into my frosting mixture.
Next I turned my hand mixer on medium high to whip up the frosting.
Frost your cake once it has cooled with the chocolate butter cream frosting.
There was this one cookbook that I fondly remember as a kid that was especially for kids. Inside was a pretty picture of a chocolate cake with a design and balloons in the background associated with birthday parties.

(One thing I've learned through the years is that the picture may look pretty but it doesn't make the food taste any better once it is made.)
Eventually one day I found a recipe that sounded good with what I imagine a yellow cake to taste like with chocolate butter cream frosting. I stumbled upon a website ( King Arthur Flour) that provided an easy homemade golden vanilla cake. I use to receive their magazines and I remember the recipes within them but forget to clip them out. Well low and behold, they are now on a website with pictures!
Since it was my husband's birthday, I wanted to try it out but I checked with him to see if he would rather have oatmeal cookies with a marshmallow filling. The cake won!
Anytime I am going to plunge into the kitchen to start cooking, I like to write down my instructions and ingredients. This helps tremendously in making sure I don't miss a step. Sure- I could have printed it out and read it before trying it; however, the process of re-writing the recipe helps imprint it in my memory. I strategize on what steps to take. I group my ingredients and methods.
As soon as I got home from work, I started my task after being barreled down my two 40 pound puppies. I tied my hair back, pushed up my sleeves, put on my apron, and washed my hands. I was ready to start cooking! Since I had both desert to make and a dinner to cook, I acted upon an important piece of advice: Mediate a minute just to put into perspective the timing of a meal plan.
Thoughts that go through my head...
What needs to be done first?
What is second? If I get this task done, what is my next?
Can I overlap cooking times for a meal?
Timing is crucial in the kitchen. If the timing goes well it translates to sitting down for dinner at our regular scheduled time. Just like a restaurant, the guests like to have their meal at a certain time. So I treat my family the same way because in reality the body likes routines and starts the digestion process in the same timely manner each day.
Homemade Vanilla Cake with Chocolate Butter cream Frosting
Back to baking a cake. Here's how I started this process. Grabbed the butter, eggs, and milk for both the cake recipe and chocolate butter cream recipe. Just like baking cookies, room temperature ingredients blend together much butter than cold.
Preheat 350 degrees.
In a large bowl- whisk together the following:
2 cups of sugar
3 1/4 cups of flour
2 1/2 teaspoons of baking powder
1 teaspoon of salt
Next- grab your very soft butter and your hand mixer.
3/4 cup butter, softened
Mix this with the dry ingredients and it will turn the mixture sandy.
Grab the milk and vanilla.
1 1/4 cup milk, room temperature
2 teaspoons of vanilla
Add all at once and turn on the hand mixer - 30 seconds at low, 30 seconds at medium.
Scrap down the sides.
Grab your eggs. I place them in warm water to bring them to room temp.
4 eggs
Crack 1 egg at time and add into the mixture. Blend for 30 seconds. Scrap time the sides. Repeat this process 3 times.
With the last egg cracked and added. Turn on the mixer for 30 seconds on medium high.
Time to pour your batter.
You can choose to use either cupcake pan or bundt or cake pans. It just depends what you would like. Just make sure to use parchment paper or cupcake holders.
Place in the oven and bake until just about light brown.
Remove from oven and set aside to cool. Once it pulls away from the side a little, remove from the pans and place on a cooling rake.
Chocolate Butter cream Frosting
The frosting to top it off. I found this recipe after a quick google search. I decided to halve the recipe as I went along. Seriously what do you do with too much frosting and in my case I'm not a big fan of the sugary topping. So I tried to make it to my liking. I taste tested it along the way. I found this important but I went into a sugar shock at certain moments.
It helps to use room temperature butter and room temperature milk. A microwave can assist if you run out of time but make sure not to let the butter get too melted into soupy liquid phase.
Place into the mixing bowl:
1 stick of butter, cut into pads.
3 cups of powder sugar
3 Tablespoons of milk
1 teaspoon of vanilla
1/8 teaspoon of salt
Use the hand blender on low and let it blend together for about 30 seconds. About a little bit more milk if it is too chunky. Smooth it out just a little with about 30 seconds more.
Chocolate- I used my unsweetened cocoa powder. On the side of the package, it provides a chocolate square equivalents= 3 Tablespoons cocoa + 1 Tablespoon canola oil
I grabbed a small pot and heat it up on low. Added in 6 Tablespoons of cocoa powder and 2 Tablespoons of canola oil. I mixed it together until it became smooth and warm.
Pour it into my frosting mixture.
Next I turned my hand mixer on medium high to whip up the frosting.
Frost your cake once it has cooled with the chocolate butter cream frosting.
Once the cake is frosted place the candles for a birthday wish!
Wednesday, January 12, 2011
Food Blogging Time
As I search the Internet for recipes, I notice more and more individuals are catching the food blog virus. It is wonderful! There are so many views and so many ways to cook wonderful food. As a reader and a writer, I want to provide an insight to how I like to cook but keeping in mind my food preferences and additionally my own family member's food preferences. I can't at all times make each person happy with my cooking (but at least they get dinner cooked for them.)
Please take a moment and review the various recipes with the hope that you copy & paste them to try later... like I do. Take time to write down a recipe to get inspired and cook up a feast while having fun cooking it!
Please take a moment and review the various recipes with the hope that you copy & paste them to try later... like I do. Take time to write down a recipe to get inspired and cook up a feast while having fun cooking it!
Tuesday, January 11, 2011
The 6:30 Dinner Crew
Welcome to a New Year! Let's dive into some new dishes with the help of my latest delivery. Today I received the following:
A bunch of carrots
A bunch of Collard Greens
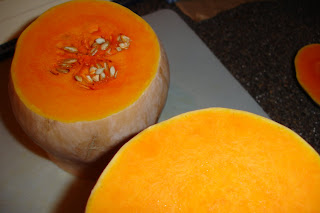
1 Butternut Squash
A bunch of Purple Kale
A bunch of Broccoli
A bunch of Chard
A pound of Zucchini
A head of Radicchio
A bunch of Leaf Lettuce
A couple pounds of Sweet Potatoes
A red Onion
A half pound of Shallots
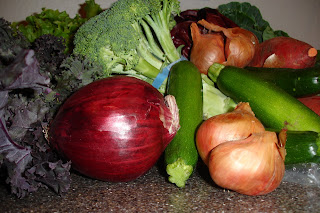
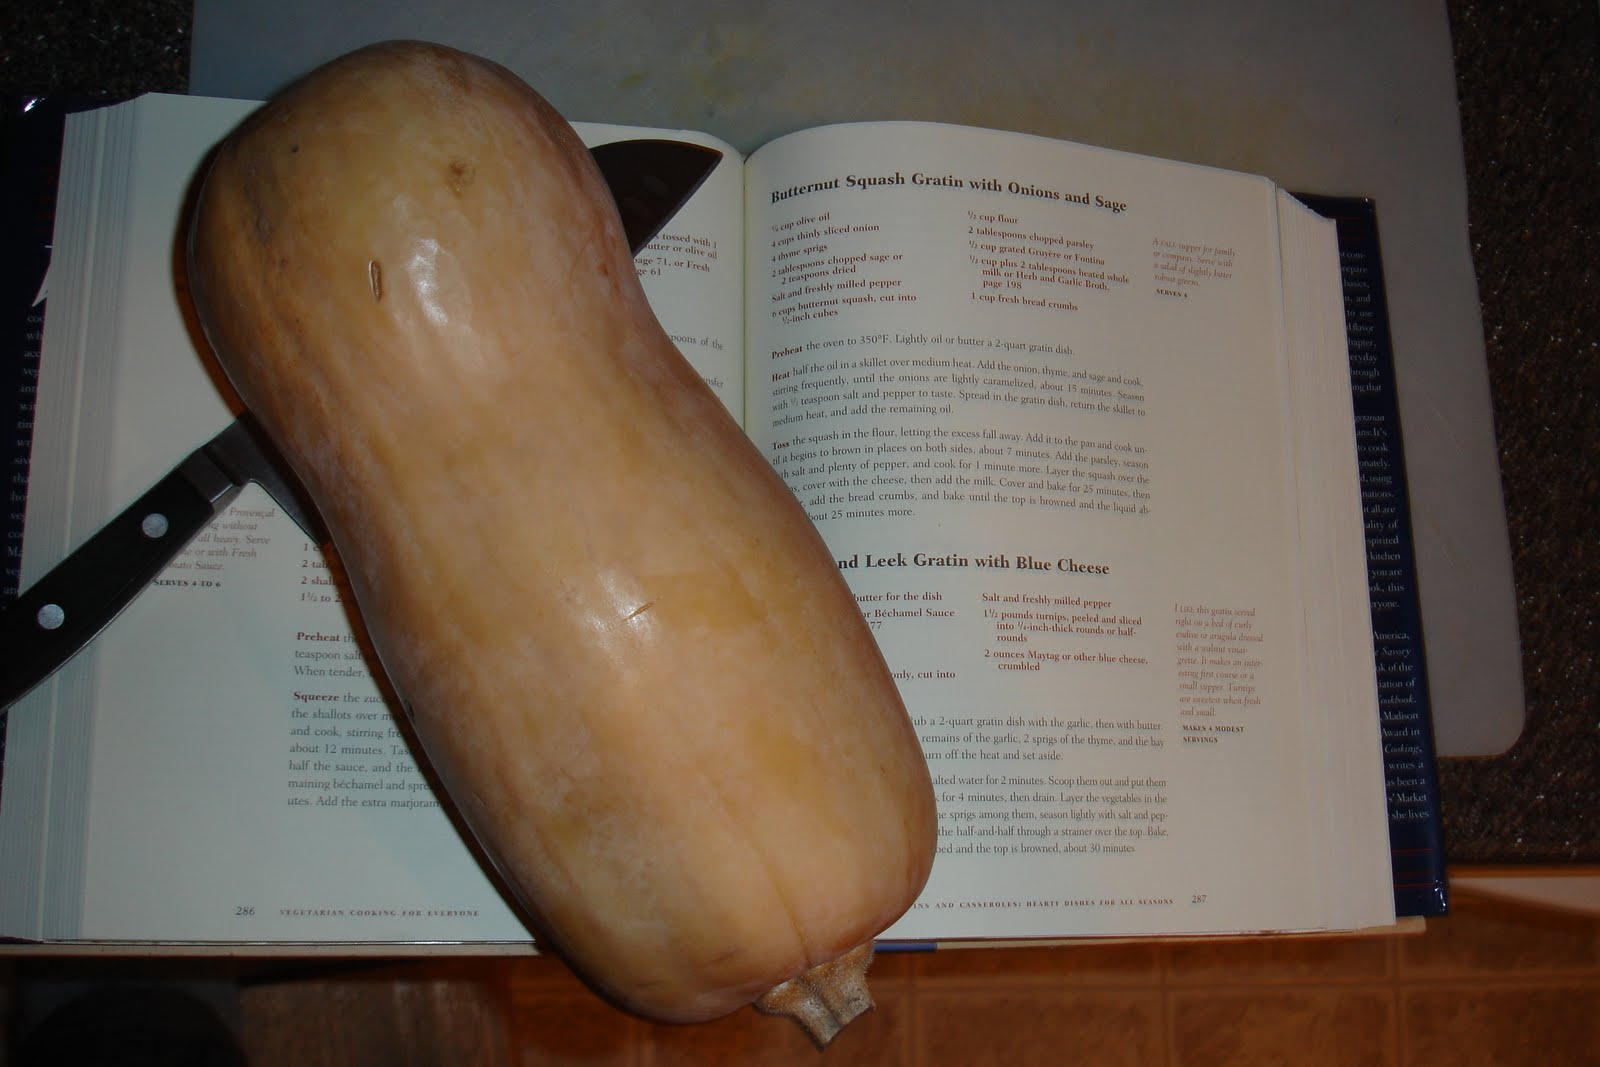
Many of the vegetables are easy to use in an average dinner menu but the Butternut Squash, Kale, and Collard Greens are my hardest to develop into a like-able dinner plate item for my family.
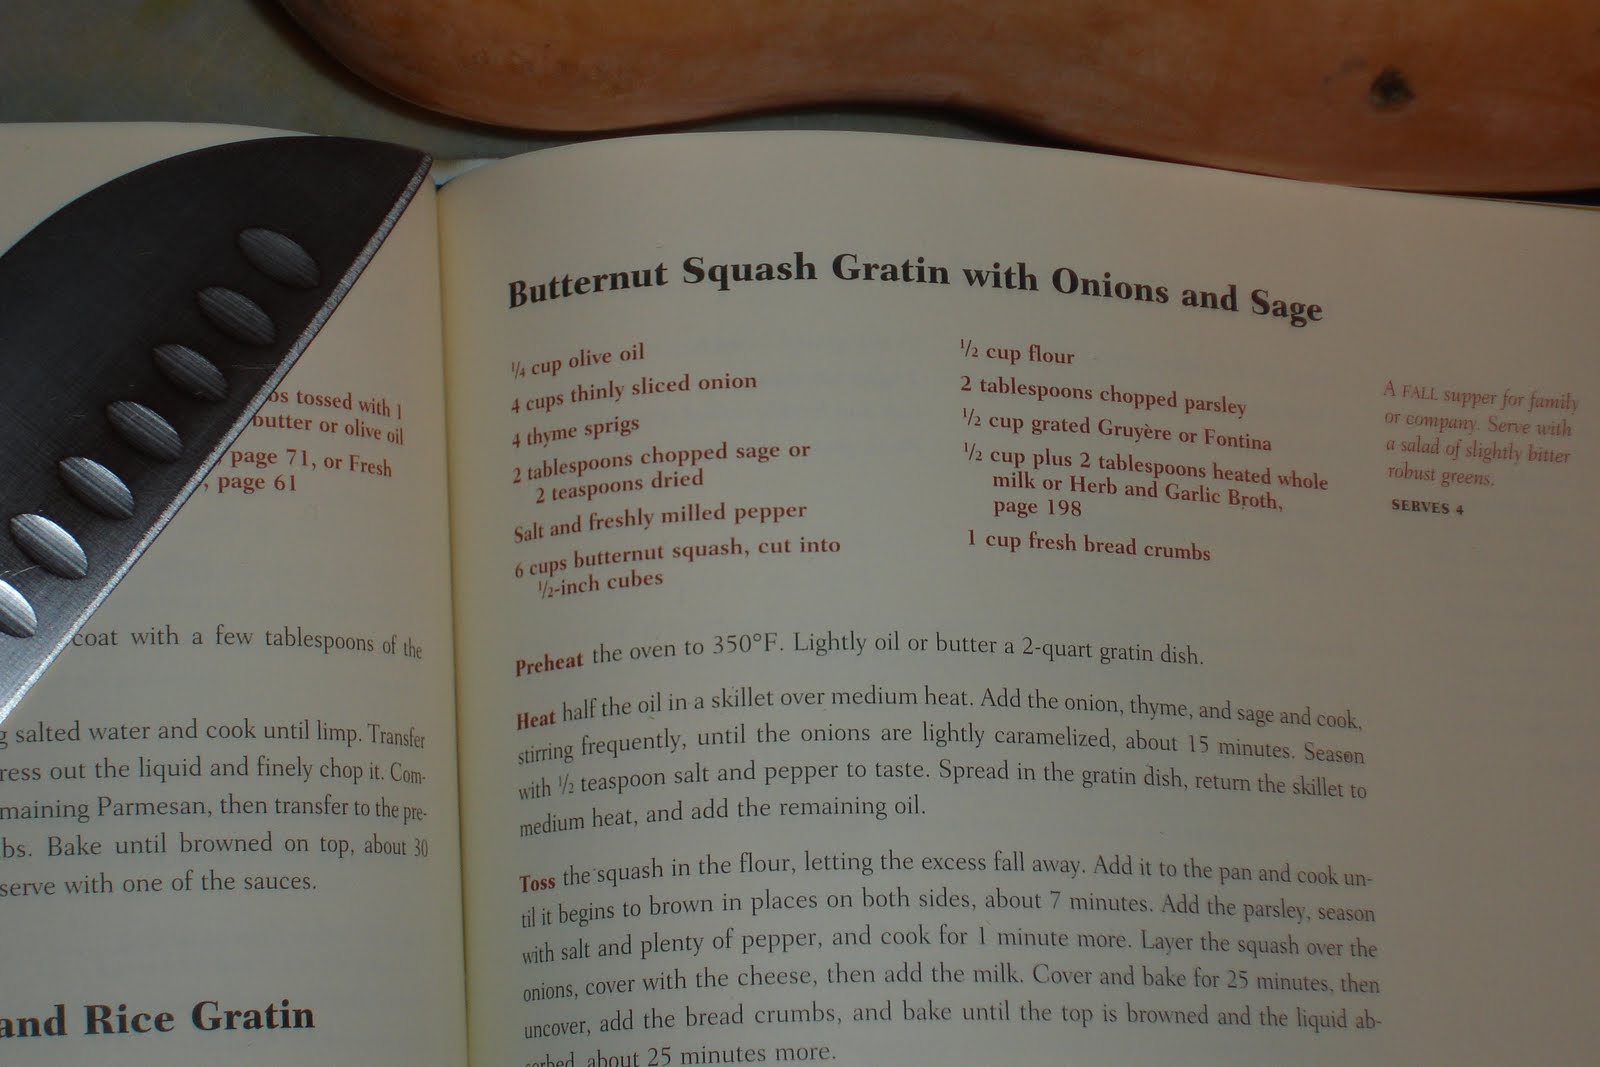
I first took on the butternut squash.What do you make with it besides a Butternut Squash Soup. Well, I turned to many cookbooks to seek my answer (or a quick search on the Internet) for recipes.

Here's what I came up with and thought would work for a tasty menu item:

Butternut Squash Gratin with Caramelized Onions
Needed in Pantry Raid:
Olive Oil
1/2 Onion
1 Small Butternut Squash
Flour
Butter
Milk
Cream Cheese
Bacon Jam - optional
Bread Crumbs
Pepper and Salt
We will break this recipe down into steps for each layer.

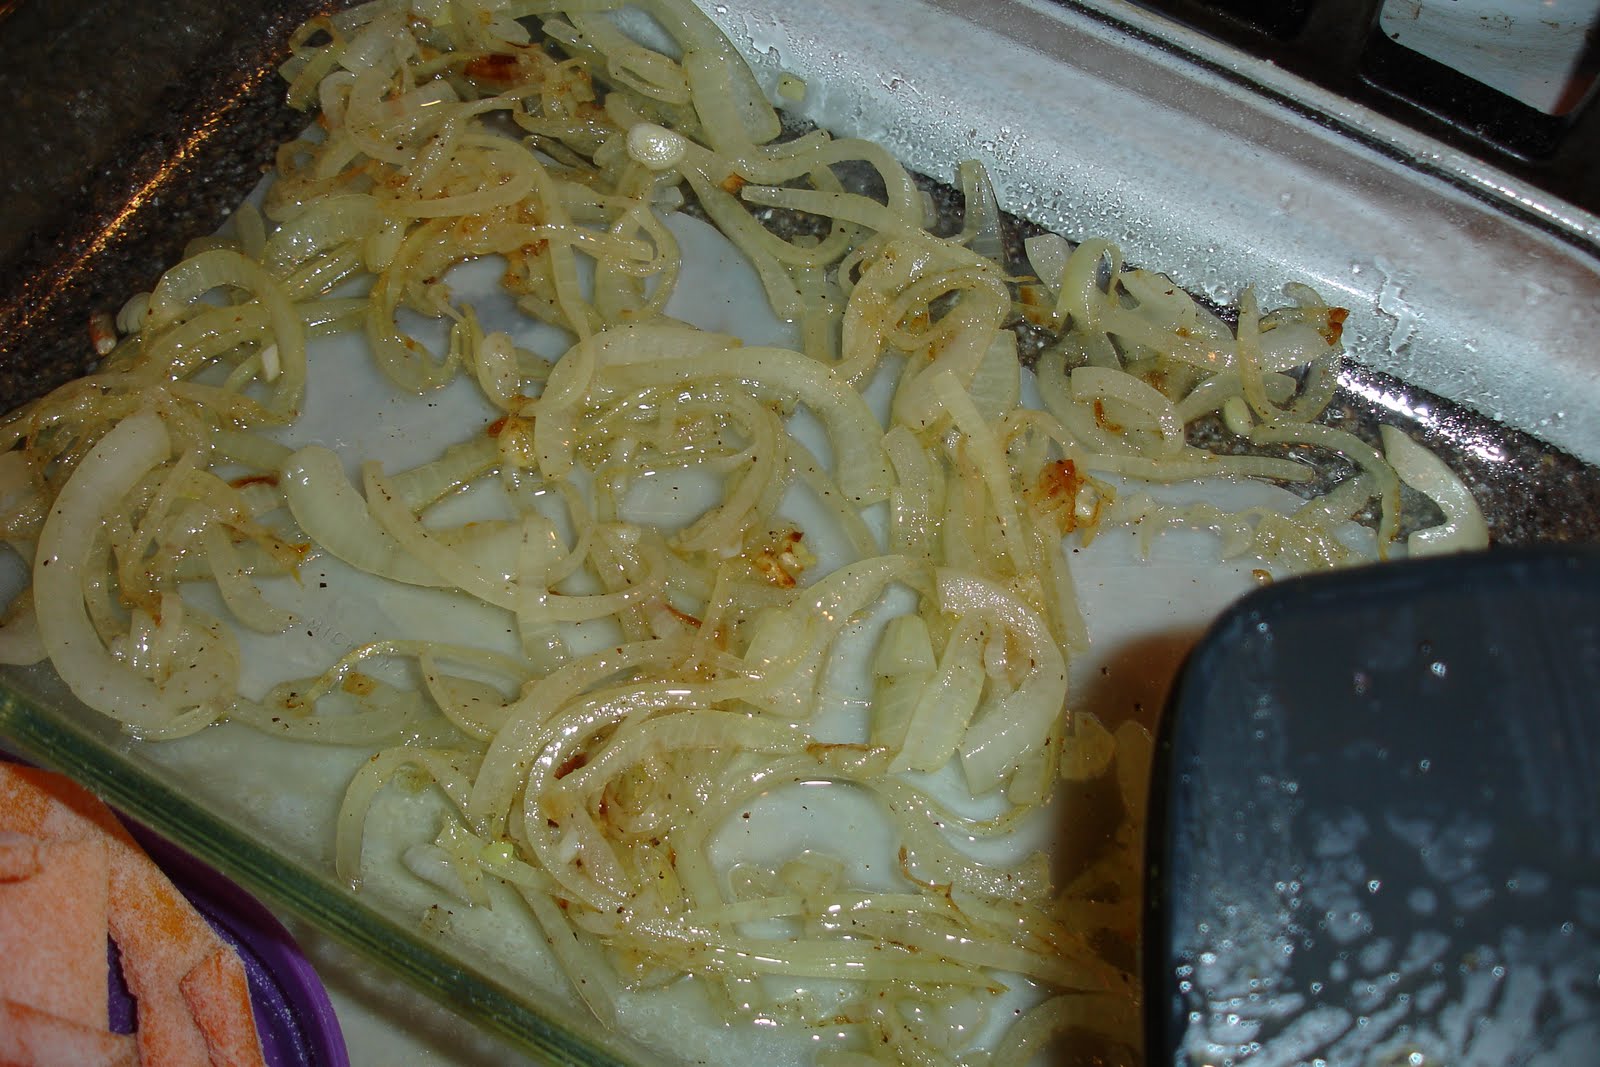
Step 1: Caramelize Your Thinly Sliced Onions, Season with salt and pepper.
Place into the bottom of the casserole dish.


Step 1A: Preheat your oven to 350 degrees.
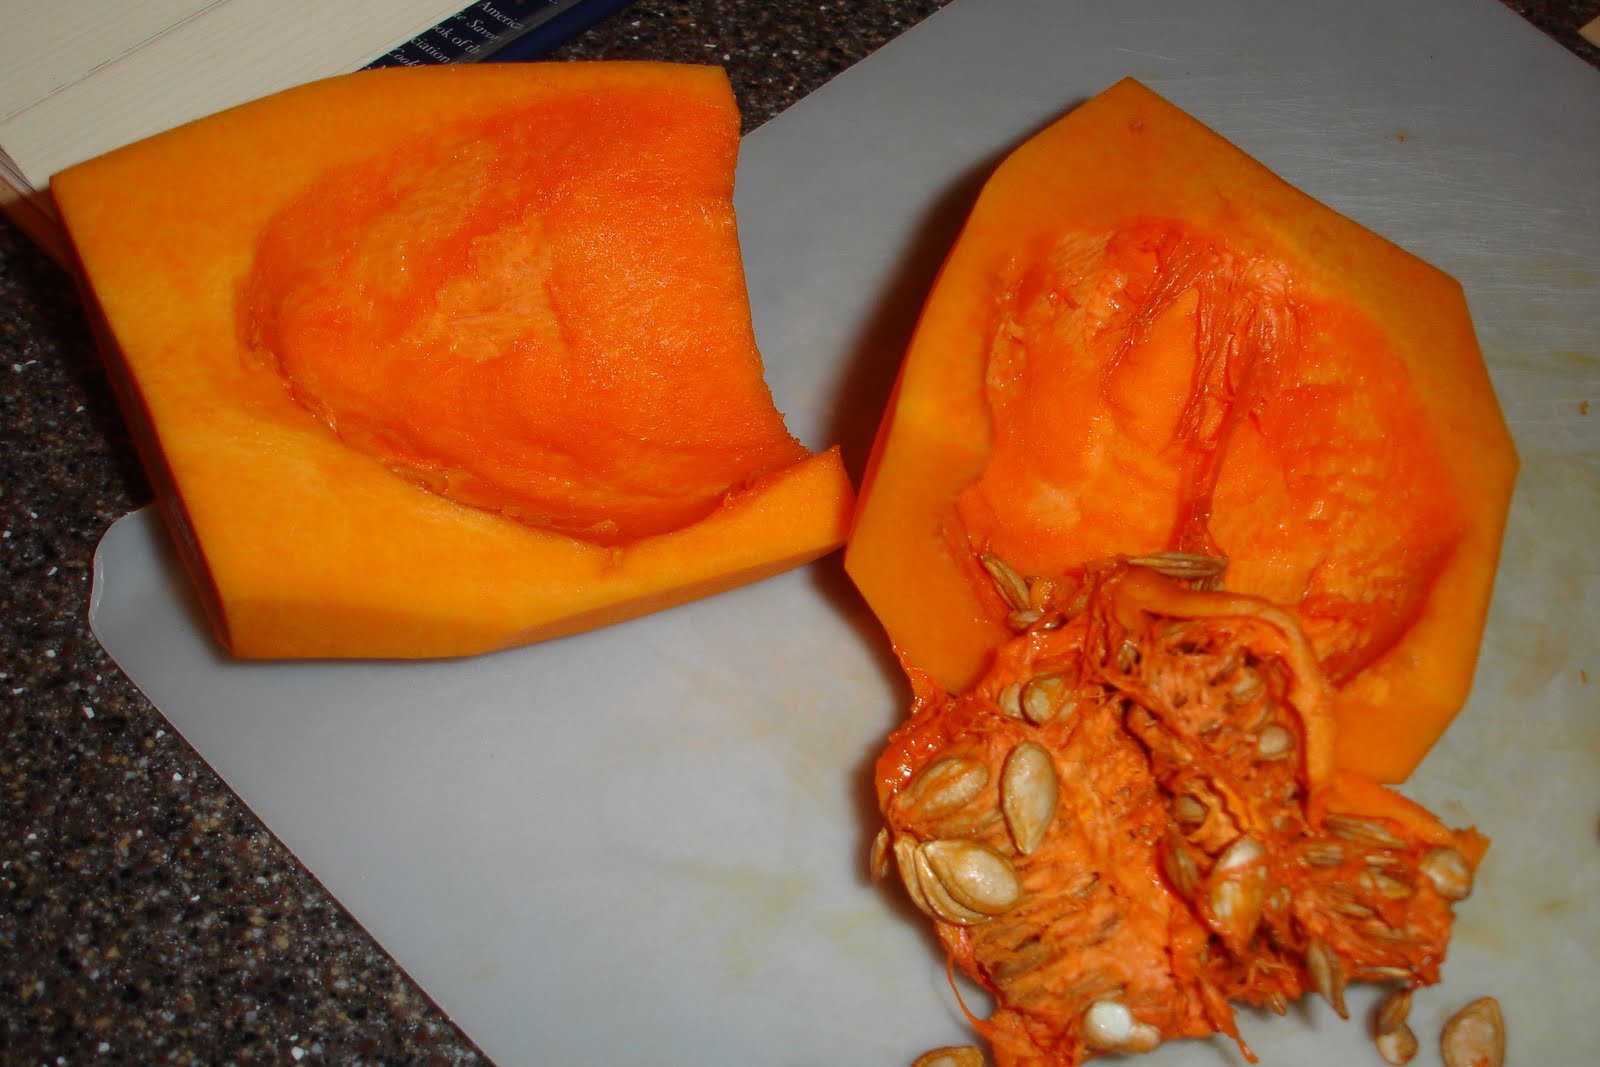
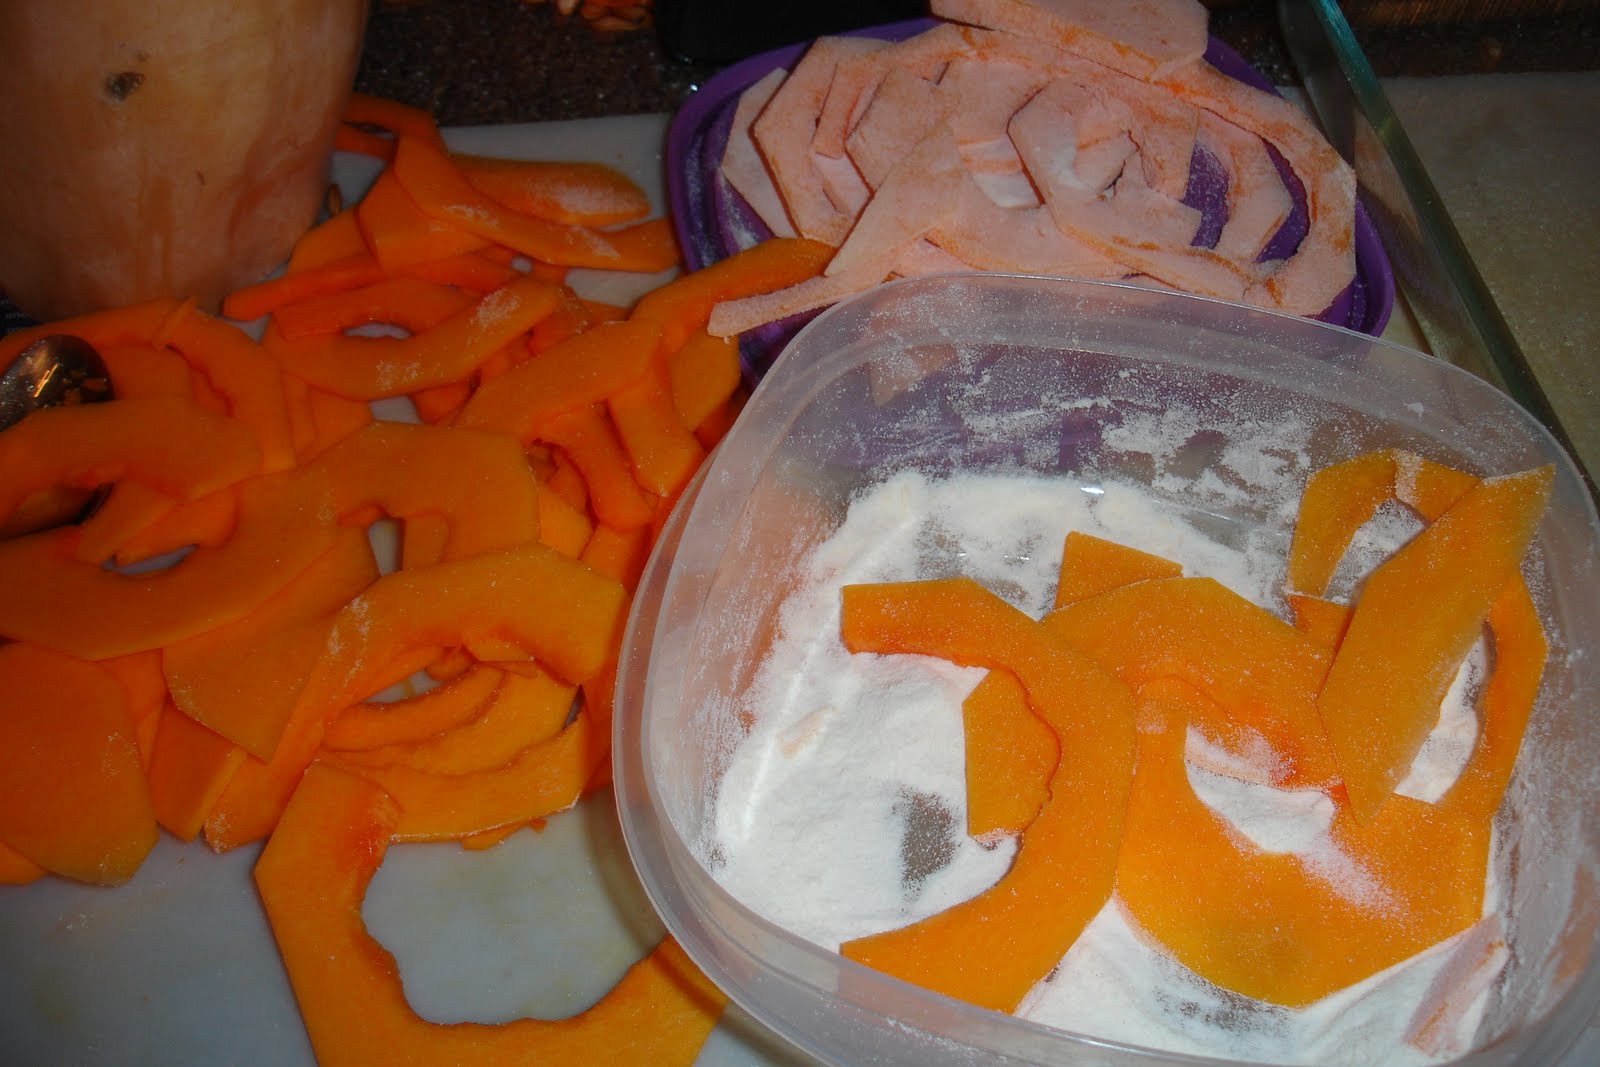
Step 2: Evenly slice your butternut squash into moon wedges. Toss in the flour and shake away extra. Place batches into the same heated skillet that was used for the onions with some additional oil for browning the butternut squash. It takes a few minutes on each side.

This helps to tenderize the butternut squash to quicken the cooking time.Add on top of the caramelized onions in the casserole dish.

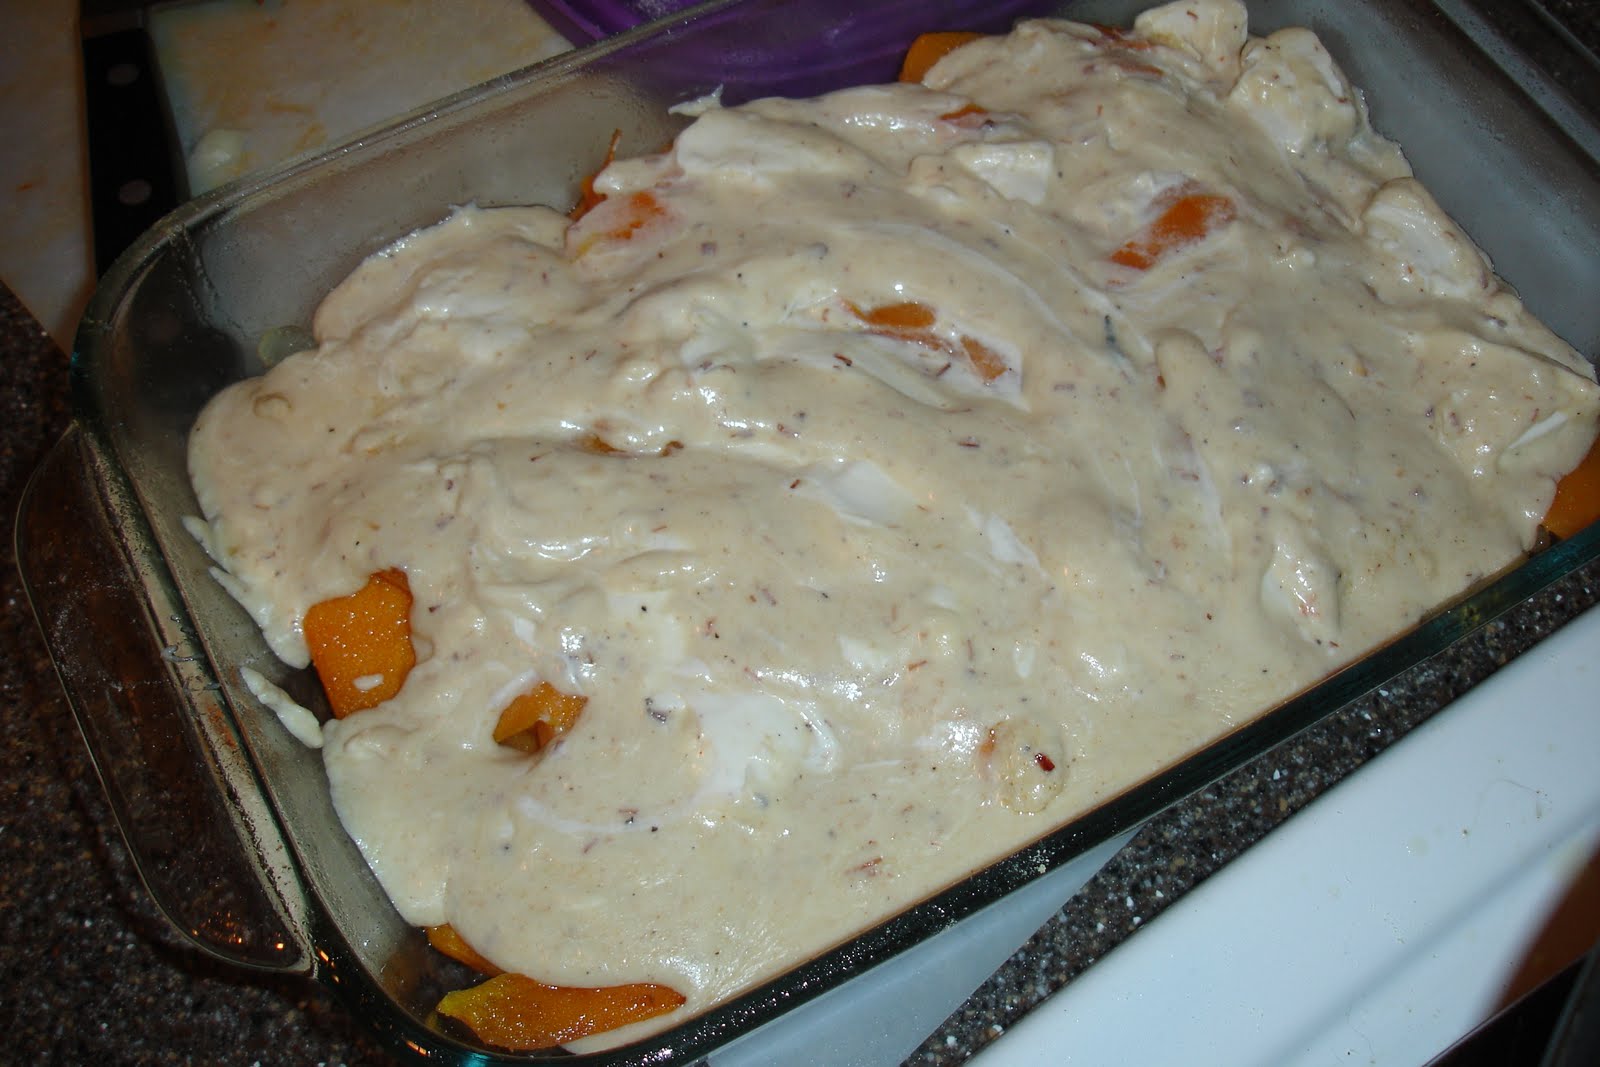
Step 3: Grab a few tablespoons of butter to melt in the same pan and add in any leftover flour to match the amount of butter added. This will start a rue that will eventually turn into a white cream cheese sauce. Add in a cup of milk for each Tablespoon of butter/flour ratio. (For example: 1 Tablespoon of butter, 1 Tablespoon of Flour, and 1 Cup of Milk - makes a perfect white gravy.) Add in a package of cream cheese (and a Tablespoon of bacon jam if you have it.) Stir until almost melts. Season and pour it on top of the butternut squash and caramelized onions in the casserole dish.

>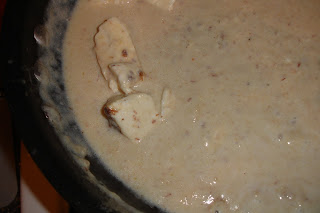


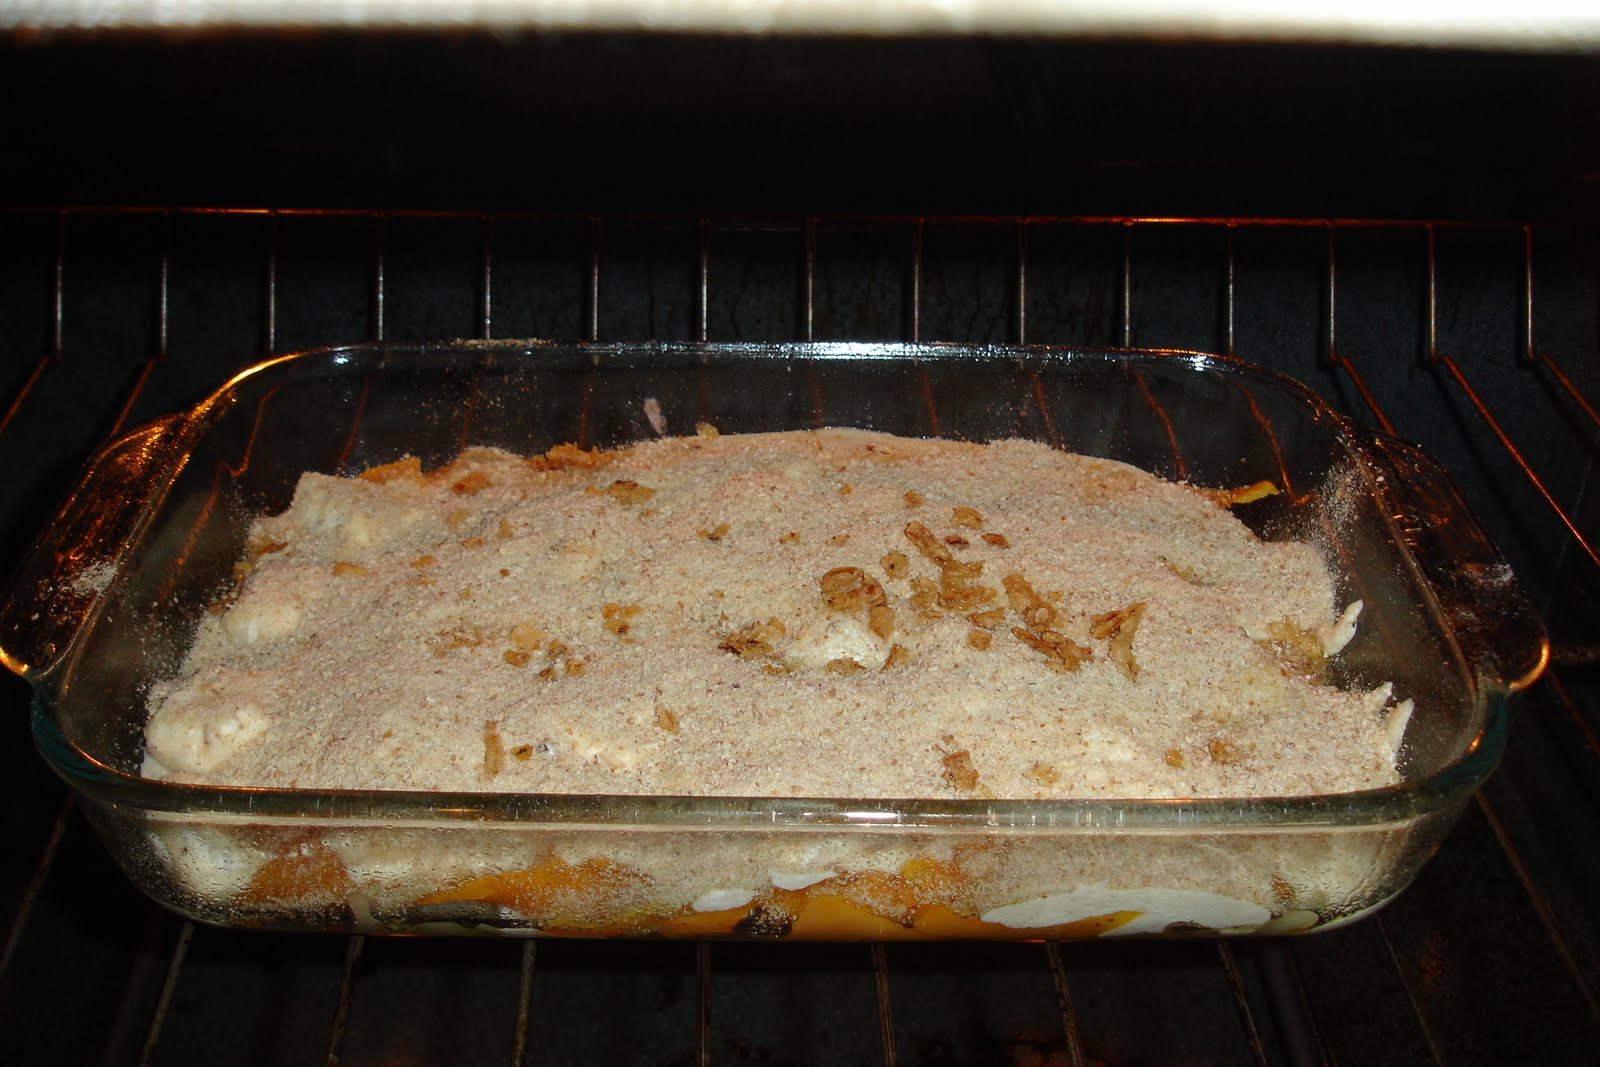
Step 4: Finally sprinkle evenly over the top a thin layer of breadcrumbs. Open your oven and let it cook for about 20-25 minutes. At the very end when the butternut squash gratin is bubbling around its edges. Turn on your broiler and let the top brown up.
Step 5: Remove and let it cool.
Step 6: Did I mention make sure to let it cool?
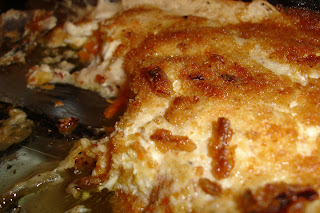
Step 7: Serve up to your family to see what they think.
Opinions from my family: Second servings and cleared plates pointed in the direction that they enjoyed it and it turned out to be a good recipe.
This recipe helped inspire me to create a vegetarian lasagna using the butternut squash and a white sauce. See upcoming posting for the recipe.
A bunch of carrots
A bunch of Collard Greens
1 Butternut Squash
A bunch of Purple Kale
A bunch of Broccoli
A bunch of Chard
A pound of Zucchini
A head of Radicchio
A bunch of Leaf Lettuce
A couple pounds of Sweet Potatoes
A red Onion
A half pound of Shallots

Many of the vegetables are easy to use in an average dinner menu but the Butternut Squash, Kale, and Collard Greens are my hardest to develop into a like-able dinner plate item for my family.
I first took on the butternut squash.What do you make with it besides a Butternut Squash Soup. Well, I turned to many cookbooks to seek my answer (or a quick search on the Internet) for recipes.
Here's what I came up with and thought would work for a tasty menu item:
Butternut Squash Gratin with Caramelized Onions
Needed in Pantry Raid:
Olive Oil
1/2 Onion
1 Small Butternut Squash
Flour
Butter
Milk
Cream Cheese
Bacon Jam - optional
Bread Crumbs
Pepper and Salt
We will break this recipe down into steps for each layer.

Step 1: Caramelize Your Thinly Sliced Onions, Season with salt and pepper.
Place into the bottom of the casserole dish.

Step 1A: Preheat your oven to 350 degrees.
Step 2: Evenly slice your butternut squash into moon wedges. Toss in the flour and shake away extra. Place batches into the same heated skillet that was used for the onions with some additional oil for browning the butternut squash. It takes a few minutes on each side.

This helps to tenderize the butternut squash to quicken the cooking time.Add on top of the caramelized onions in the casserole dish.
Step 3: Grab a few tablespoons of butter to melt in the same pan and add in any leftover flour to match the amount of butter added. This will start a rue that will eventually turn into a white cream cheese sauce. Add in a cup of milk for each Tablespoon of butter/flour ratio. (For example: 1 Tablespoon of butter, 1 Tablespoon of Flour, and 1 Cup of Milk - makes a perfect white gravy.) Add in a package of cream cheese (and a Tablespoon of bacon jam if you have it.) Stir until almost melts. Season and pour it on top of the butternut squash and caramelized onions in the casserole dish.

>

Step 4: Finally sprinkle evenly over the top a thin layer of breadcrumbs. Open your oven and let it cook for about 20-25 minutes. At the very end when the butternut squash gratin is bubbling around its edges. Turn on your broiler and let the top brown up.
Step 5: Remove and let it cool.
Step 6: Did I mention make sure to let it cool?

Step 7: Serve up to your family to see what they think.
Opinions from my family: Second servings and cleared plates pointed in the direction that they enjoyed it and it turned out to be a good recipe.
This recipe helped inspire me to create a vegetarian lasagna using the butternut squash and a white sauce. See upcoming posting for the recipe.
Subscribe to:
Posts (Atom)